# OCI Container Registry - OCI User To Manage Containers
LaunchPad downloads and deploys Satellite container images that stored in Docker Hub (docker.io) by default. LaunchPad may also be configured to access Satellite container images that have been uploaded by the CMDB-360 Support Team to a private OCI Container Registry in your OCI Tenancy (in a specified OCI Compartment). This document describes the process of creating an OCI user to allow the CMDB-360 Support Team the limited access required to upload and manage Satellite container images in your private OCI Container Registry.
Note
LaunchPad requires outbound HTTPS traffic to Docker Hub (docker.io) in order to download Satellite container images. This will require the subnet of your OCI VCN to allow outbound traffic to the public Docker Hub site. No inbound traffic is required, only outbound. If your organization security policies do not allow outbound traffic from your tenancy, you should consider using the OCI Container Registry option for LaunchPad.
# Create Limited Capability OCI User To Manage Container Images
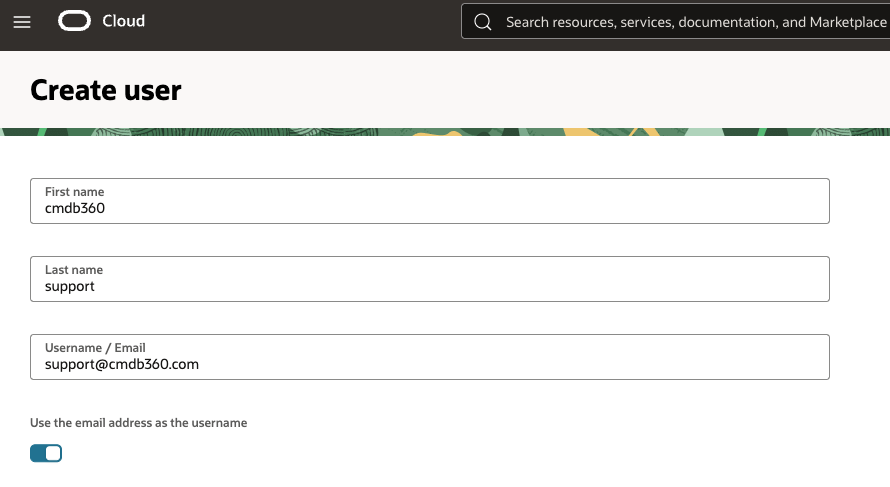
In order to allow the CMDB-360 Support Team the ability to manage Docker images within your designated OCI Container Registry, create a limited capability user in the desired OCI Domain. We suggest you name this user “cmdb360 support” and use the email address support@cmdb360.com.
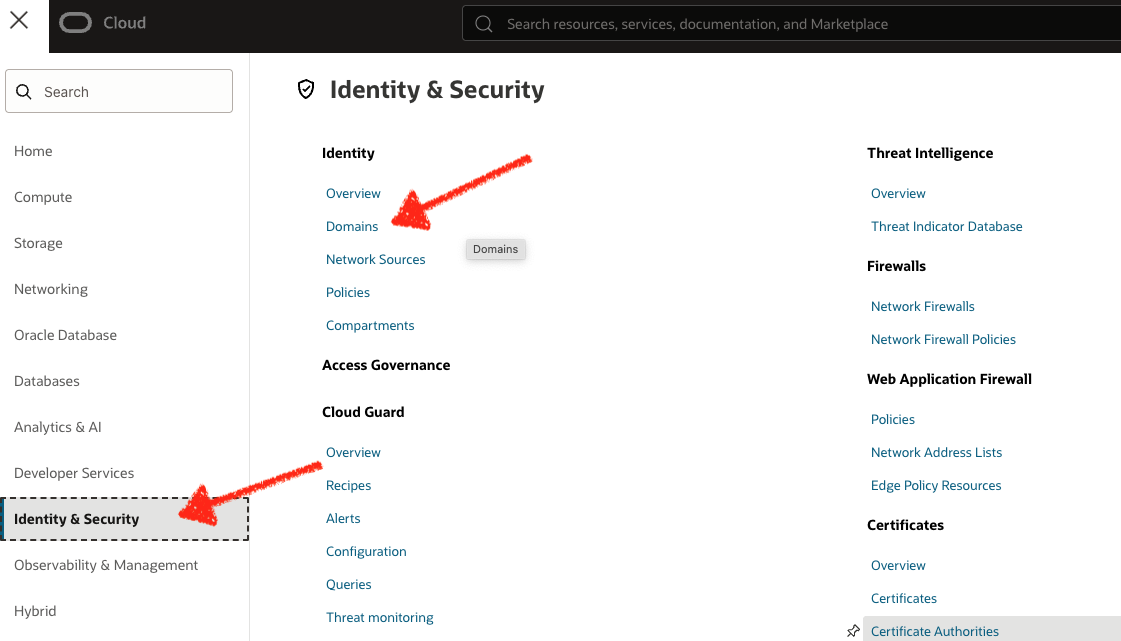
First, access the Users menu from the Identity & Security main menu, then click Domains:
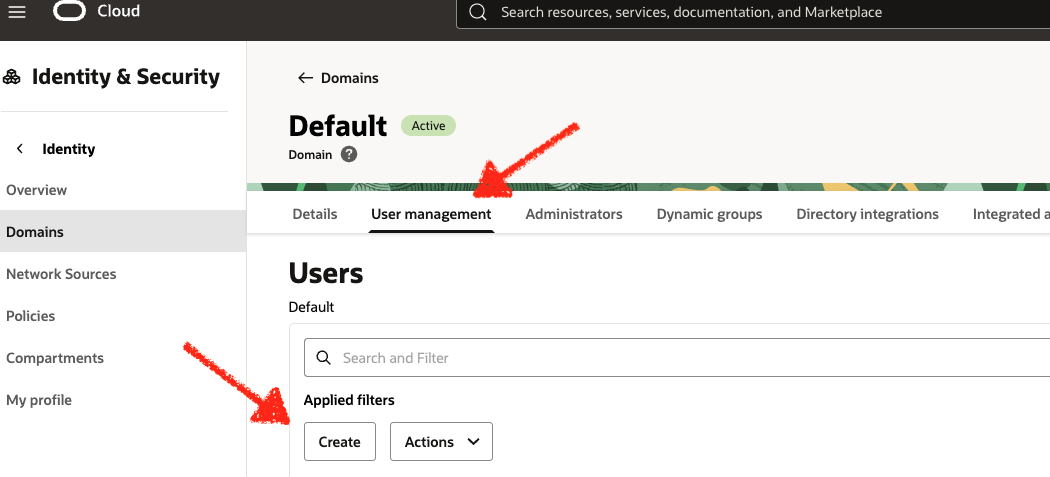
Choose the Domain in which you wish to add the user (the default domain is called “Default”). Once the Domain is accessed, click the User management tab, then click the Create button:
Name the user (we suggest first name “cmdb360”, last name “support”) and provide the email address (we suggest support@cmdb360.com):
If you have already created a Group for the user, you may select the Group as well, otherwise, simply click the Create button to provision the user.
Once the user has been created, click the Actions button and then the “Edit user capabilities” option:
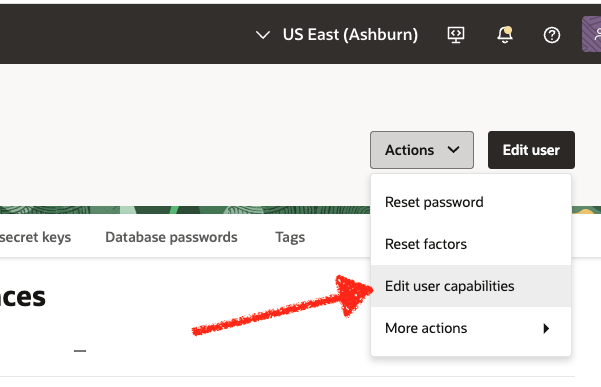
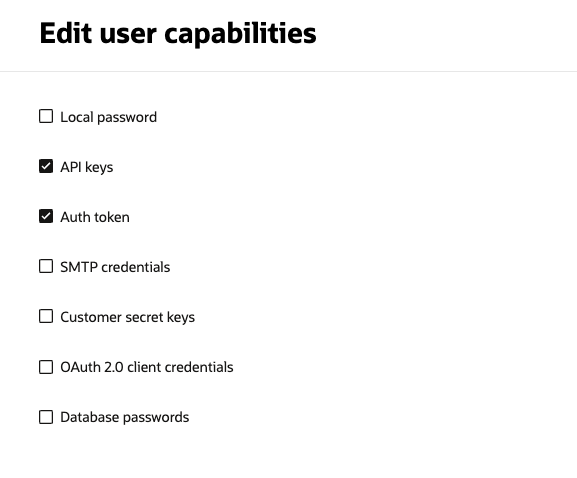
Next, click off any chosen capabilities except for “API keys” and “Auth token”. This means that the user may not login to the OCI Portal and may only generate and use the API and Auth Token capability.
Note
Users must have the “Local password” capability enabled to log in to the OCI portal.
# Create API Key For OCI User
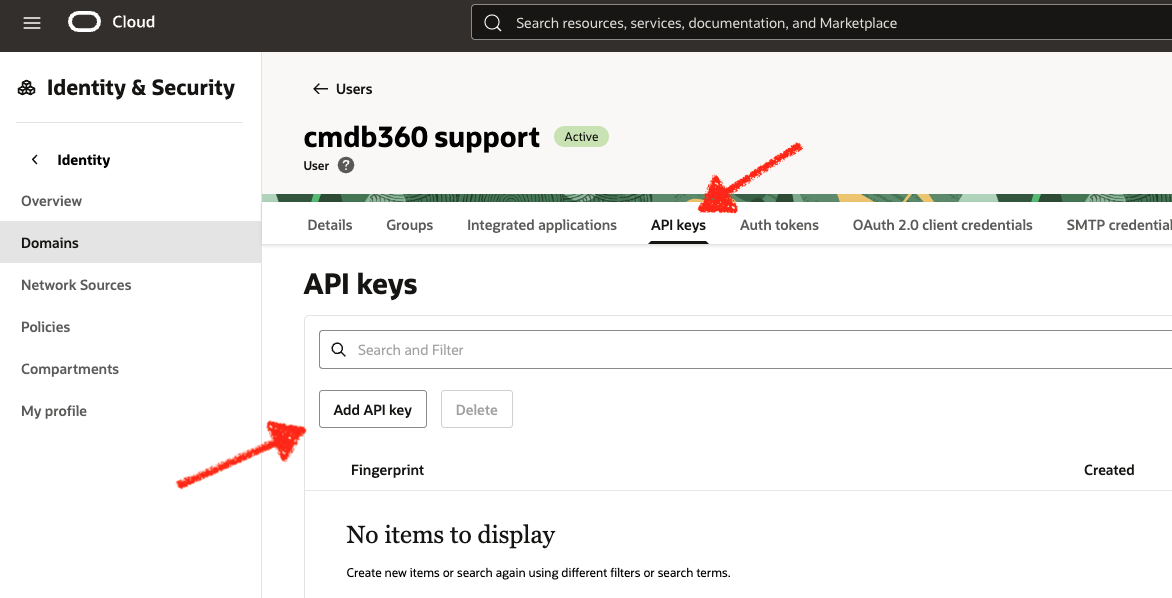
OCI API Keys are used to allow API access to the Oracle Public API for functions that are permitted for a user based on the policies granted to their account. To create an API key, from the user detail screen, click the API keys tab, then click the Add API key button:
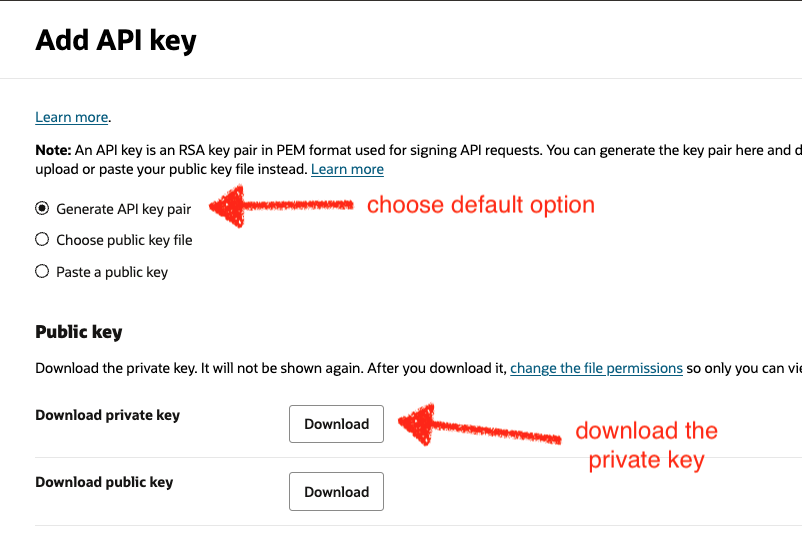
From the Add API key screen, choose the default action of generating a API key pair and click the Download private key button to download the key. Next click the Add button to add the API key:
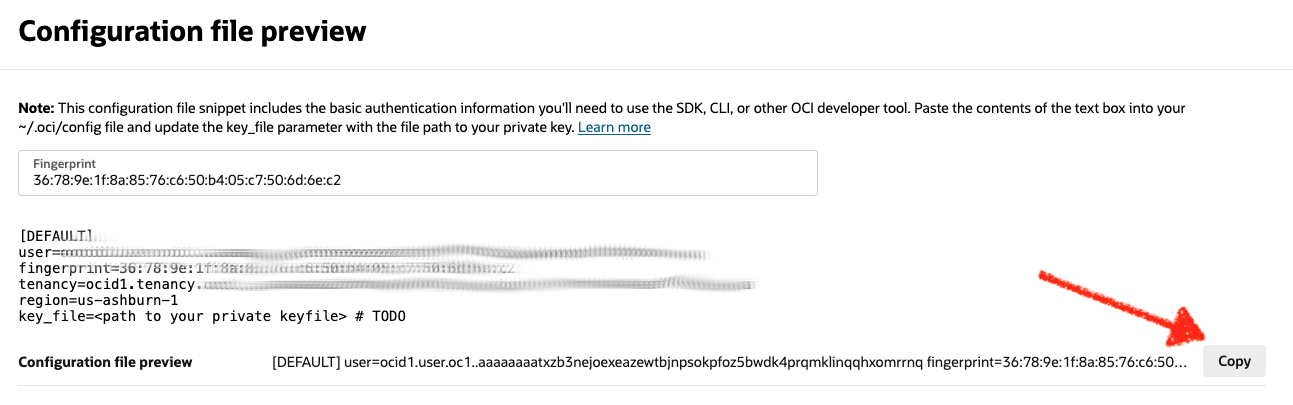
The private key will be downloaded to your desktop. In addition, a configuration file preview will be shown. Copy this configuration file to a file called “config” on your desktop along with the downloaded API private key. You will need to supply these files to the CMDB-360 Support Team.
Important
You will need to provide the copied configuration file details along with the downloaded private key to the CMDB-360 Support Team in order for the team to create the OCI Container Registry in your desired compartment. If you wish to create the registry yourself, you may do so by logging in as the cmdb360 support OCI user and using the OCI API to create the registry. In this case, you may skip the procedure to creating and providing an API key.
# Create Auth Token For OCI User
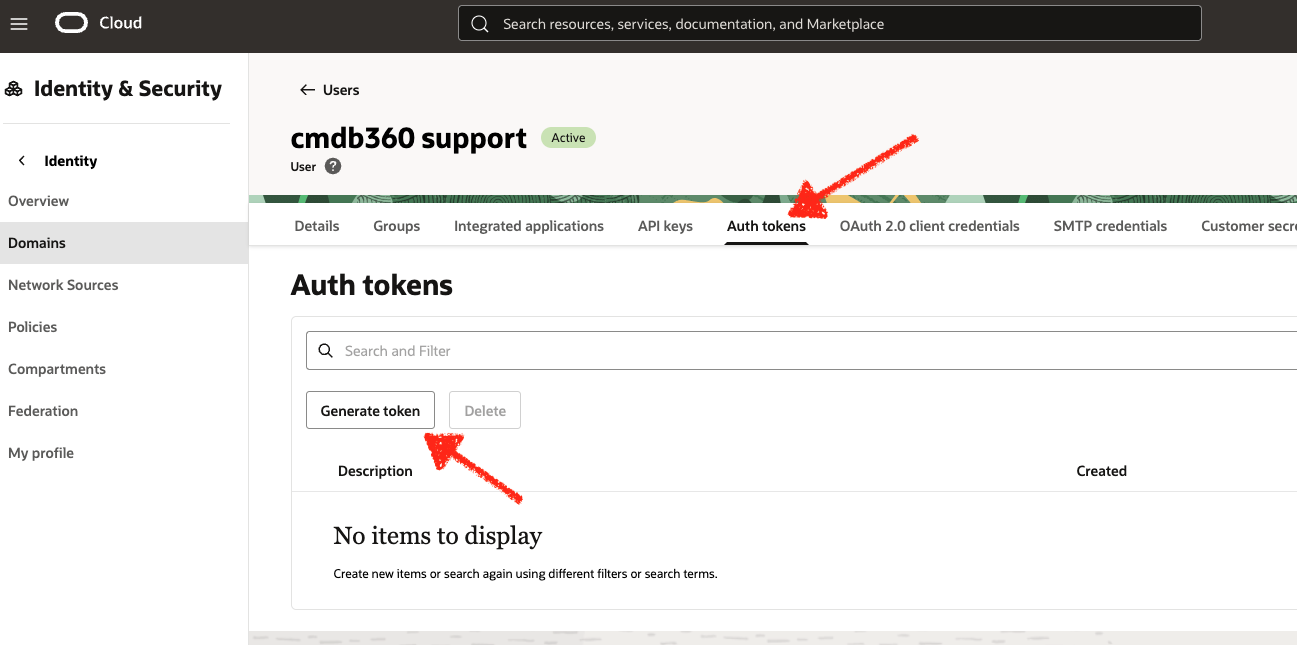
Next, you will need to generate an Auth token for the user. From the user detail screen, click the Auth tokens tab, then click the Generate token button:
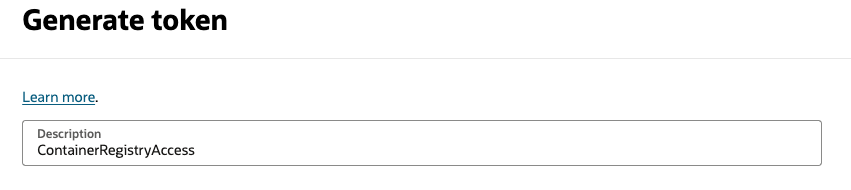
Add a description for your token to remind you of the purpose, for example, you may enter “ContainerRegistryAccess”:
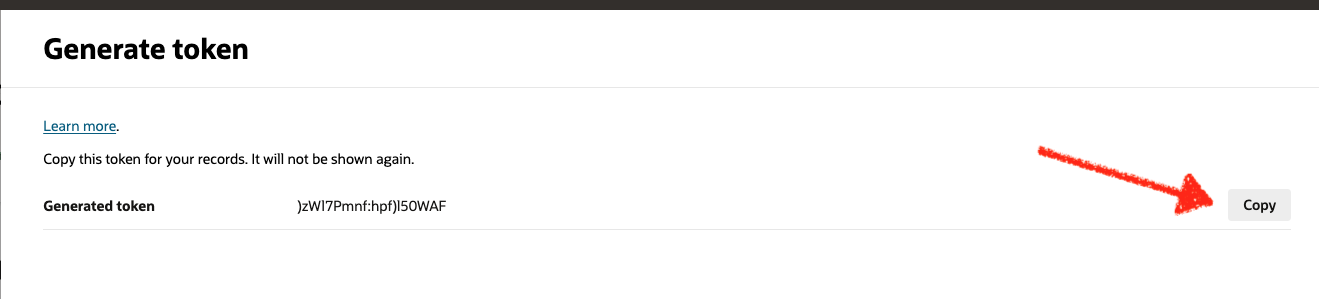
Once your token is generated, make sure to copy it as you will need to provide this to your CMDB-360 Support Team. Please note that you may revoke the token at any time. You may also generate the token only during planned Docker container images updates (please coordinate this with the support team).
Create Group For User In Order To Provide Policy Permissions
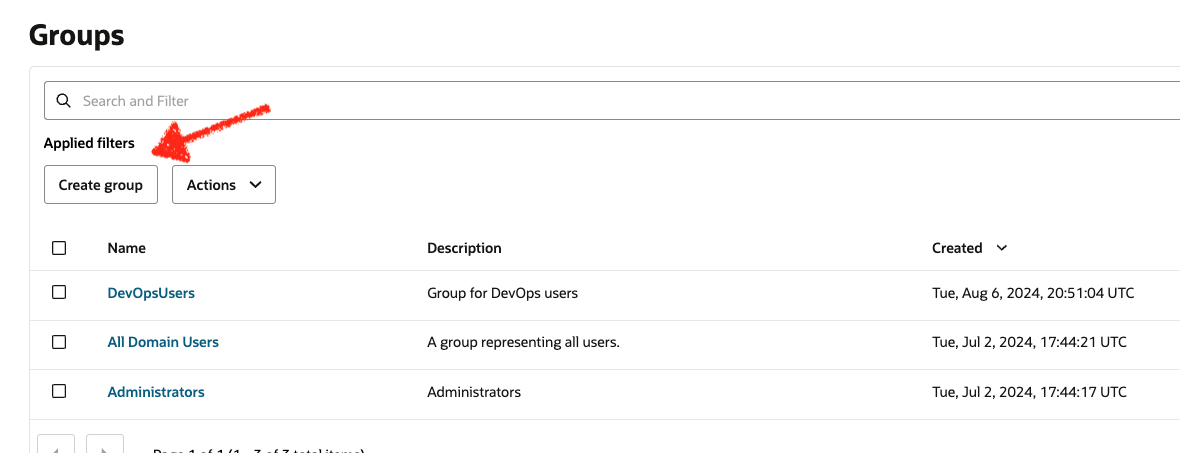
Next, create a Group for your user. This is necessary to assign OCI Policies that will allow the management of the OCI Container Registry images in your tenancy. To create a user, navigate to the Domain you used for your user, and click the User management tab once again. Next, scroll down to the Groups section (just below the Users). Click the Create group button:
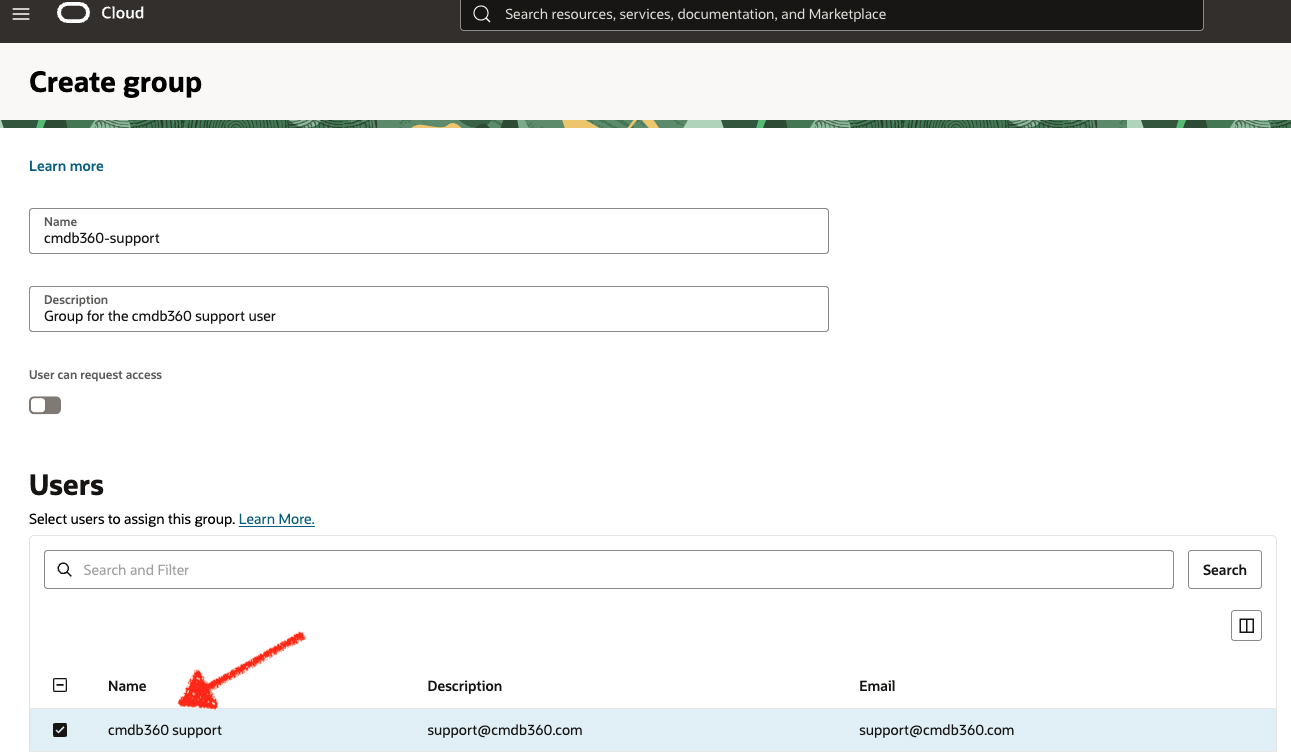
Name your group and provide a description. We suggest the name “cmdb360-support” to help you remember the purpose of the group. Next choose the user you created above as a member of the group and click the Create button:
# Create Policy To Allow Group To Manage Your OCI Container Registry In Compartment
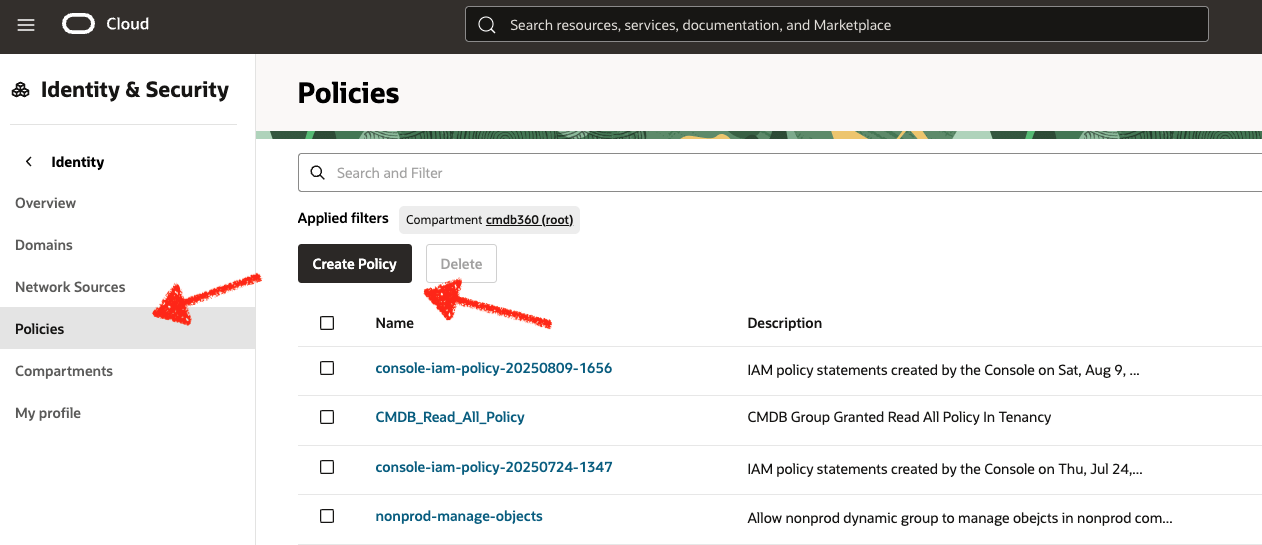
You must grant policy permission for the group to allow the user to upload and manage Docker images in the OCI Container Registry. To create a policy, navigate from the Identity & Security main menu to the Policies sub-menu and then click the Create Policy button:
Provide a name for your policy. We suggest “cmdb360-manage-containers”. Next click the Show manual editor button under the “Policy Builder” and add a policy similar to “ALLOW group cmdb360-support to manage repos in compartment
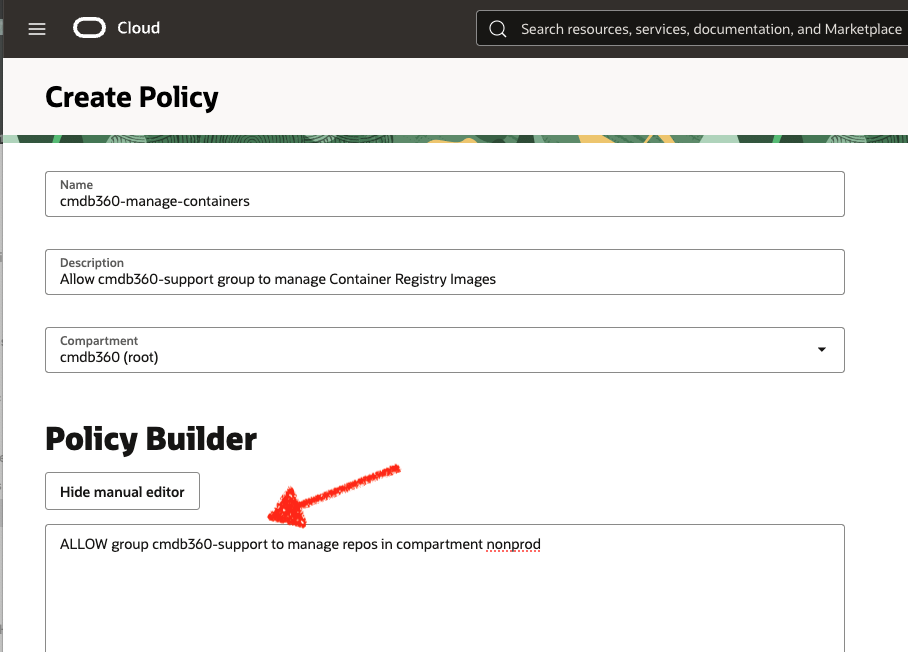
Please note that you must specify the compartment (by name or by ocid) for the Container Registry you have created for the CMDB-360 Satellite Docker Images that are used by LaunchPad.