# Configure AWS Satellite Using AWS Console
The AWS Satellite discovers CMDB details about your AWS cloud resources using the AWS API. The AWS Satellite requires a named user with read only access permissions to your environment. Prior to use, the AWS Satellite must be configured as described below.
The configuration process requires the following steps:
- Create an AWS user with Read Only access to your environment,
- Create an Access Key for your user, and
- Configure the Satellite to use your user Access Keys
# Create AWS User With Read Only Access
Use the AWS Identity and Access Management (IAM) service to create a user with read only access permission to your AWS environment. You may access the IAM service using the Services drop down and selecting the “Security, Identity, & Compliance” menu option. Next select the IAM (Manage access to AWS resources) option as shown in the following:

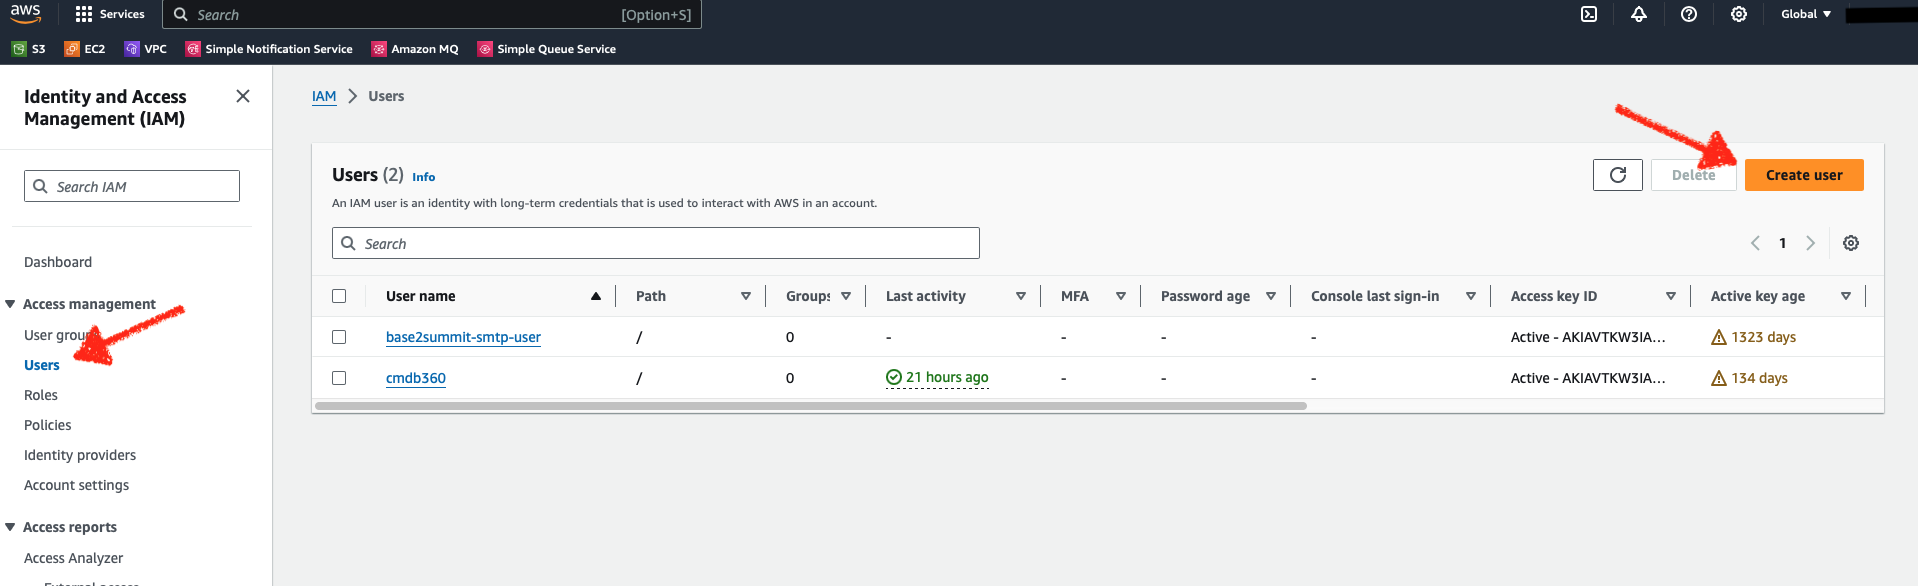
Select the Users menu option under Access Management and then click the Create user button as shown in the following screenshot:
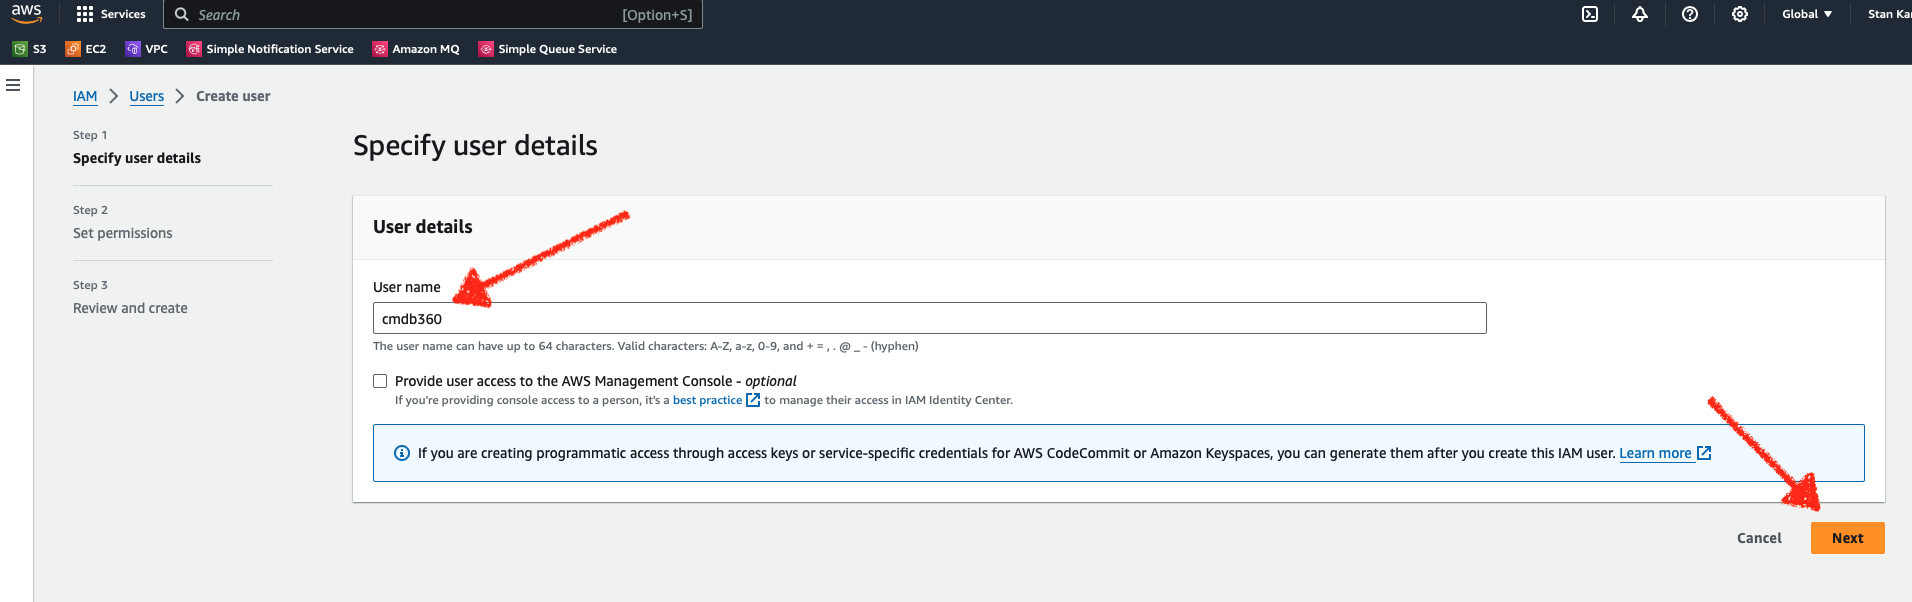
You will receive a three step workflow to create the user. Under the first step “Specify user details”, add your user name - we suggest you use the name “cmdb360” in order to easily remember the user in the future. Click the Next button to go to the next step where you can set the permissions:
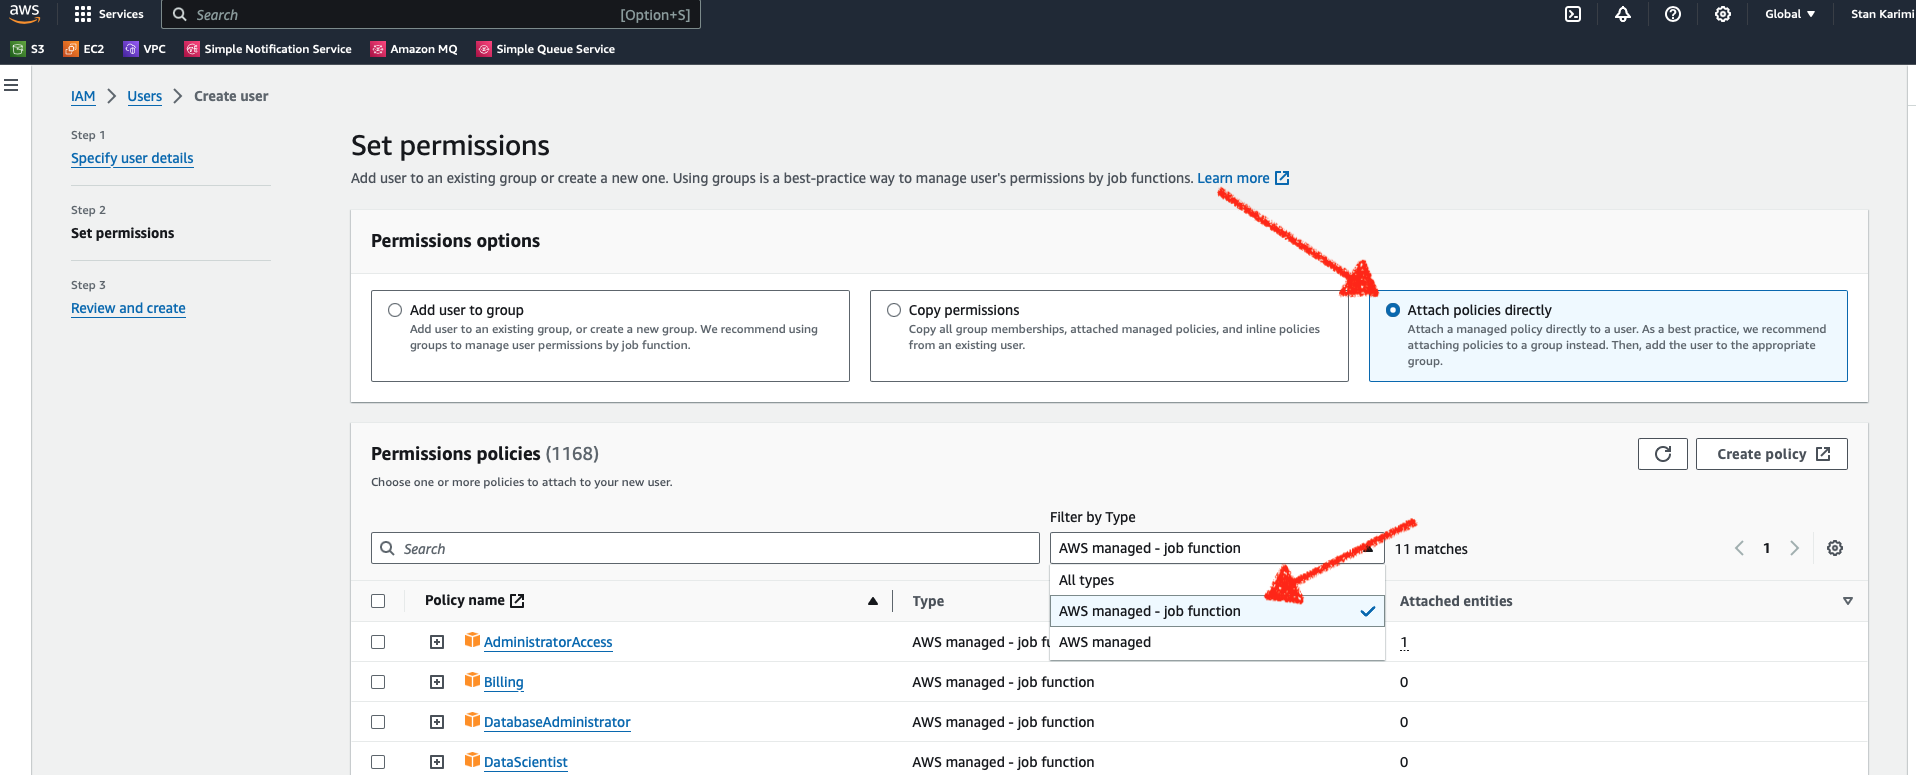
From the Set permissions screen (Step 2), Choose “Attach policies directly” and then under the Permissions policies section, use the Filter by type dialog to find the “AWS managed - job function” filter as shown in the following screenshot:
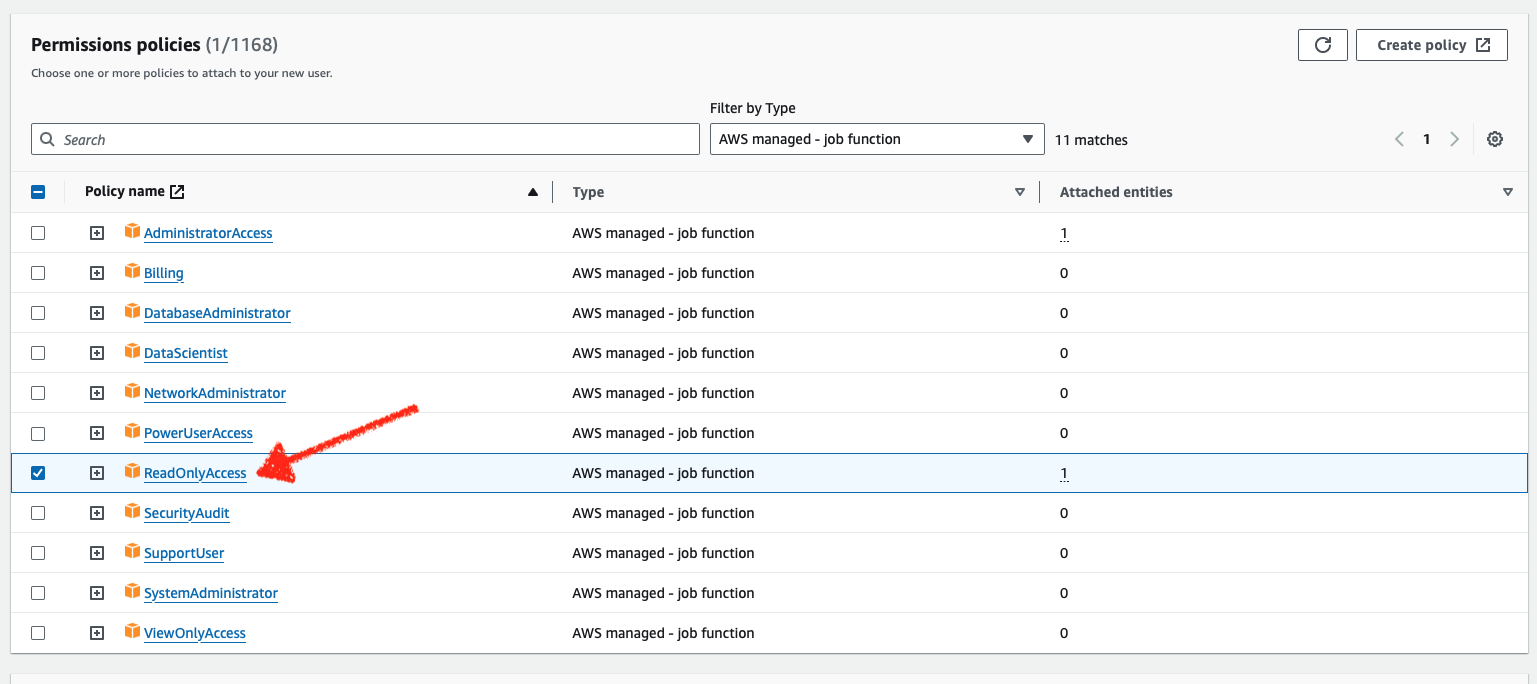
Next, select the ReadOnlyAccess policy as shown and click the Next button.
Finally review your user details and then click the Create user button to create the cmdb user.
# Create Access Key For User
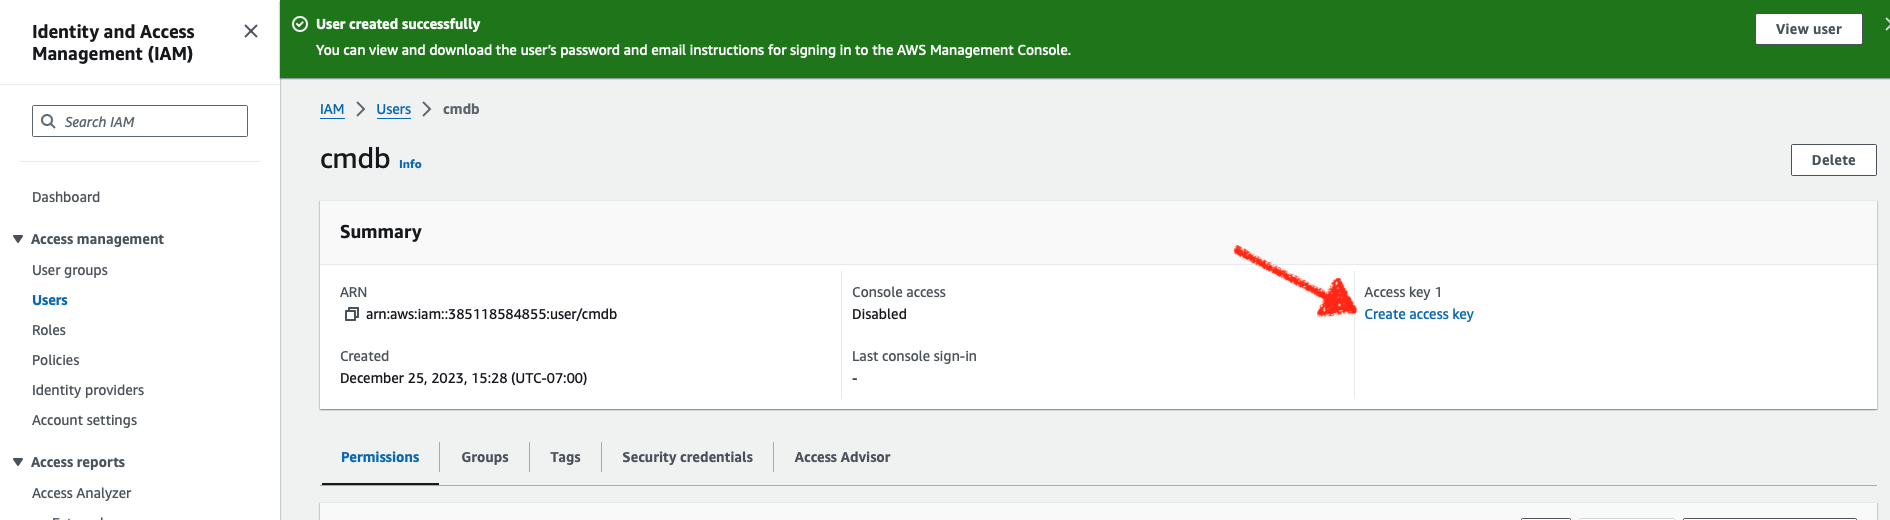
The AWS API accesses your AWS cloud resource details by authorizing with AWS Access Key credentials. To create the required access key, open your user and click the “Create access key” link as shown in the following screenshot:
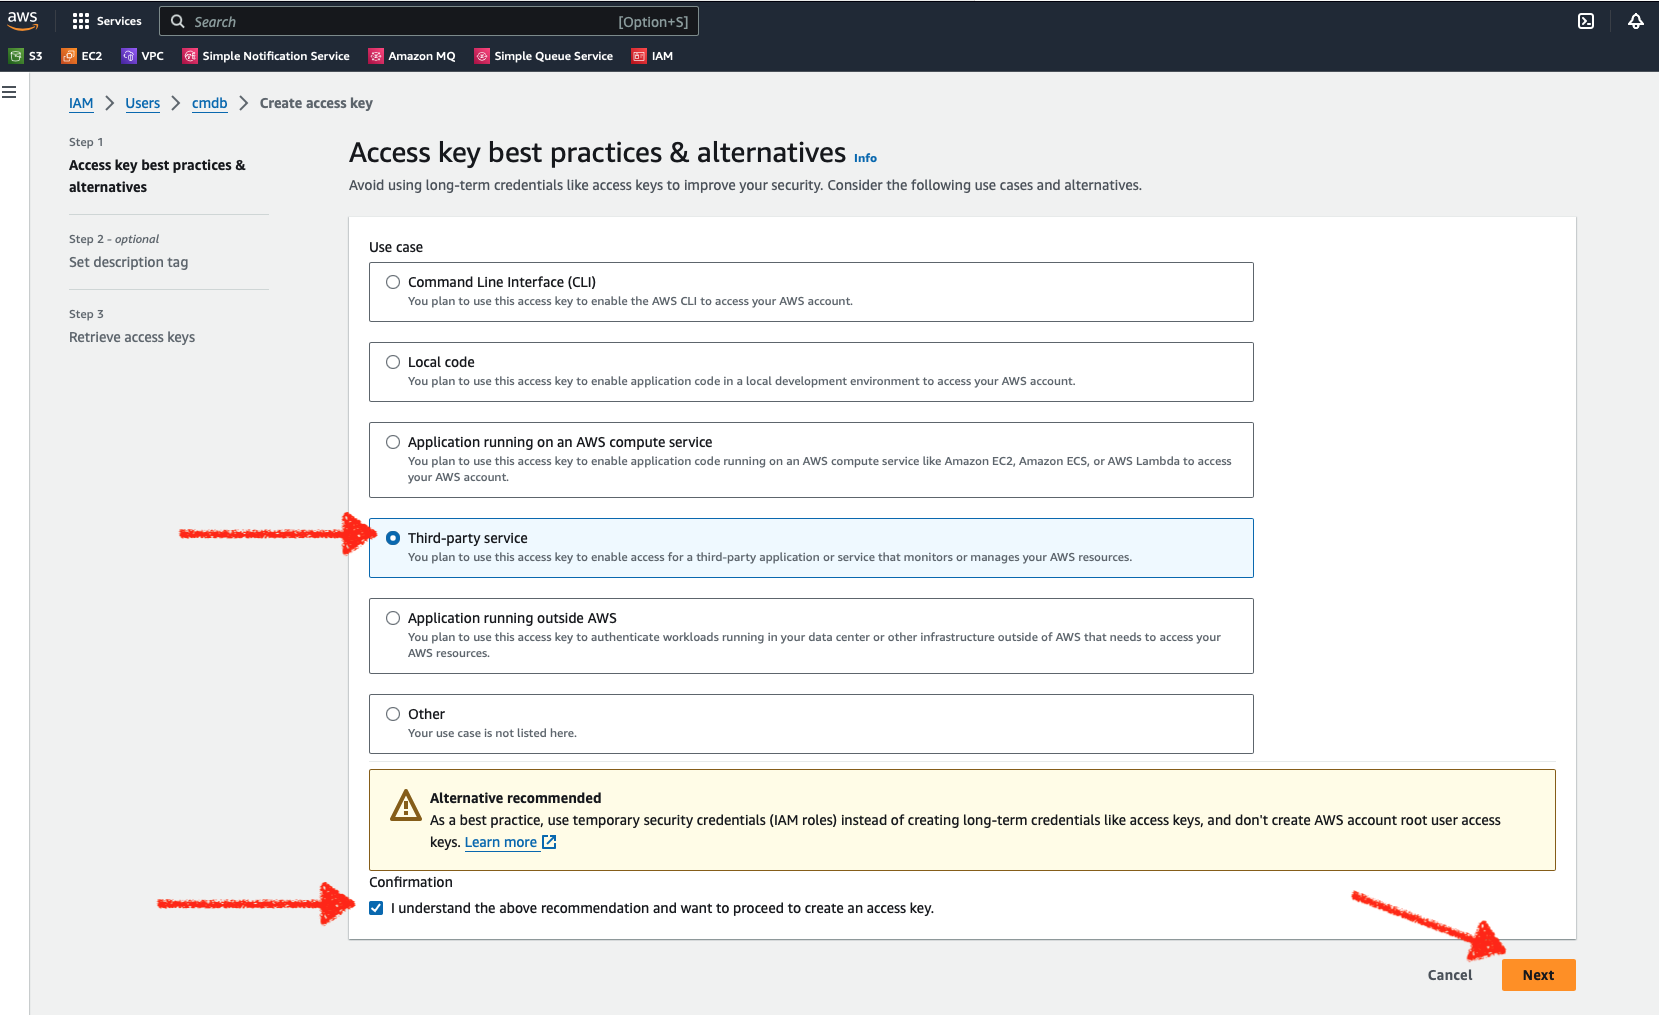
Next, select the “Third-party service” option and click the checkbox to acknowledge the recommendation by AWS to user temporary credentials as the alternative recommended method. Since the AWS satellite is an “always connected” software tool that only receives read only access, we believe it is safe to provide long-term access using the access key…and you may rotate these keys at any time.
Click the Next button to set a description for your access key and create the bundle. We suggest you name the access key “satellite-keys” so you can easily remember the purpose.
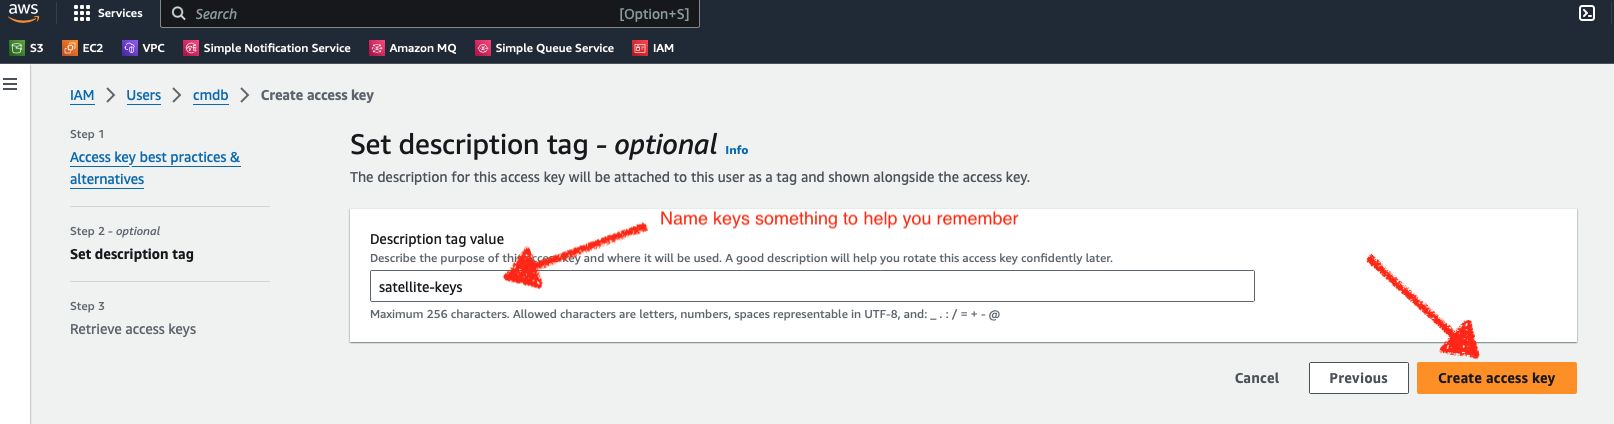
Next, click the Create access key button to generate and retrieve the access key.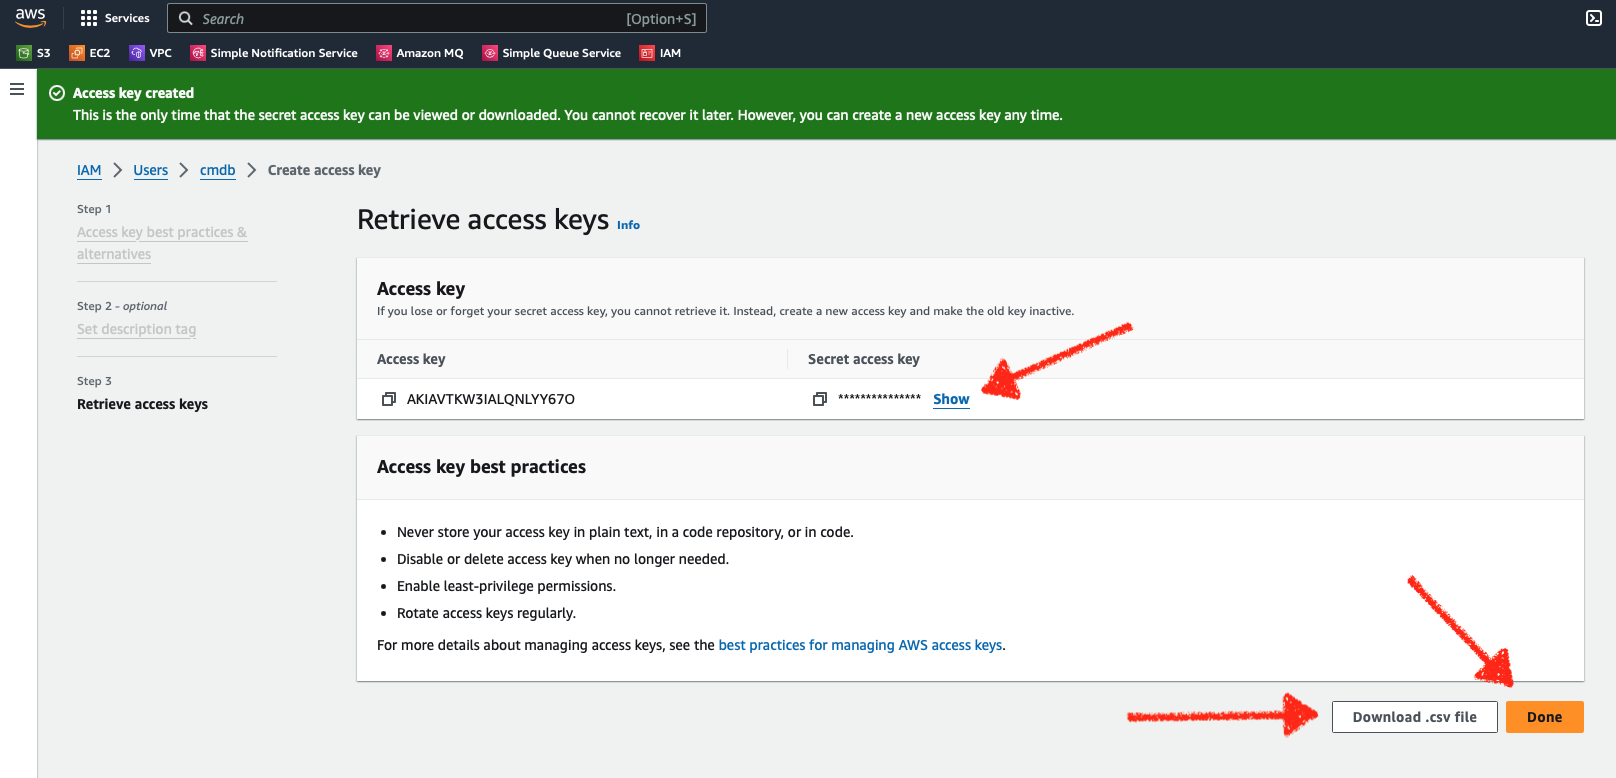
You may copy the Access key and the Secret access key to a safe location or you may download the keys in a .csv file. You will need these keys to configure the satellite and please be aware that this is the only time AWS will provide you these keys (you’ll need to delete and re-create the keys if you lose them).
# Configure Satellite With Access Key
Configuration is performed from the Linux command line of the deployed AWS Satellite. If the satellite was deployed as a compute instance from AWS, you would typically log in as the “ubuntu” user with your identity keys as you would any other AWS instance you have launched. For satellites deployed as a Docker container, you may access the running container using the “docker exec” command.
Upon successful login, if you are not the root user, switch to root with the following command:
sudo -s
Once you have accessed the shell of the Satellite, navigate to the satellite bin directory, typically found at /opt/satellite/bin:
cd /opt/satellite/bin
Now run the ConfigTool program:
./ConfigTool
You should receive the AWS Configuration Utility as shown below:
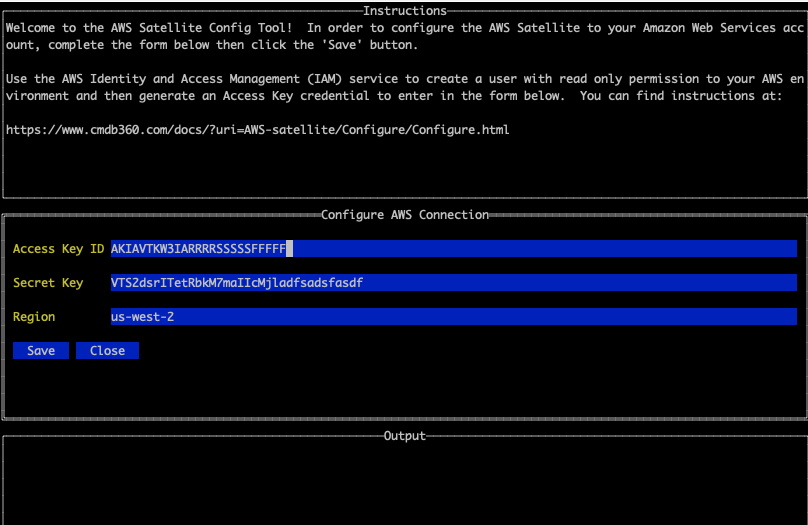
Simply enter the Access Key ID and Secret Key that you generated in the steps above and also enter the AWS Region where your AWS environment resides. Tab to the Save button and click Enter to save the configuration.
Please note that each AWS region will require a separate satellite installation and configuration.
# Configure Satellite Connection To CMDB
In order for the AWS Satellite to send AWS resource roster information to the CMDB-360 Base Station, it must be configured with the CMDB-360 Host (and port) and Access Token. This is a standard configuration for all Satellites, no matter the type. Please see the AdminTool documentation for details on how to configure the AWS Satellite to your CMDB-360 Base Station.