# OCI Marketplace Installation
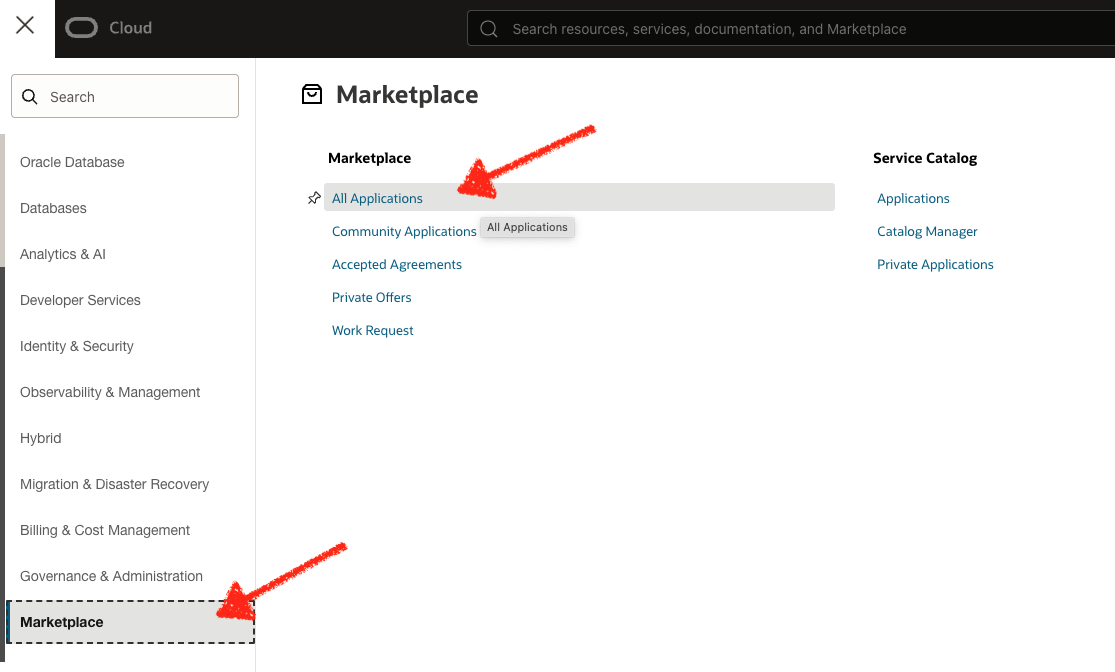
The CMDB-360 Base Station is publicly available to deploy as an appliance in your OCI tenancy from the OCI Marketplace. You may also find related CMDB-360 applications such as the CMDB-360 OCI Satellite and CMDB-360 LaunchPad. Simply access your OCI account from the OCI Cloud Portal and navigate to the Marketplace main menu option.
Choose All Applications from the Marketplace menu:
You may simply search for “cmdb” to find all CMDB-360 products as shown:
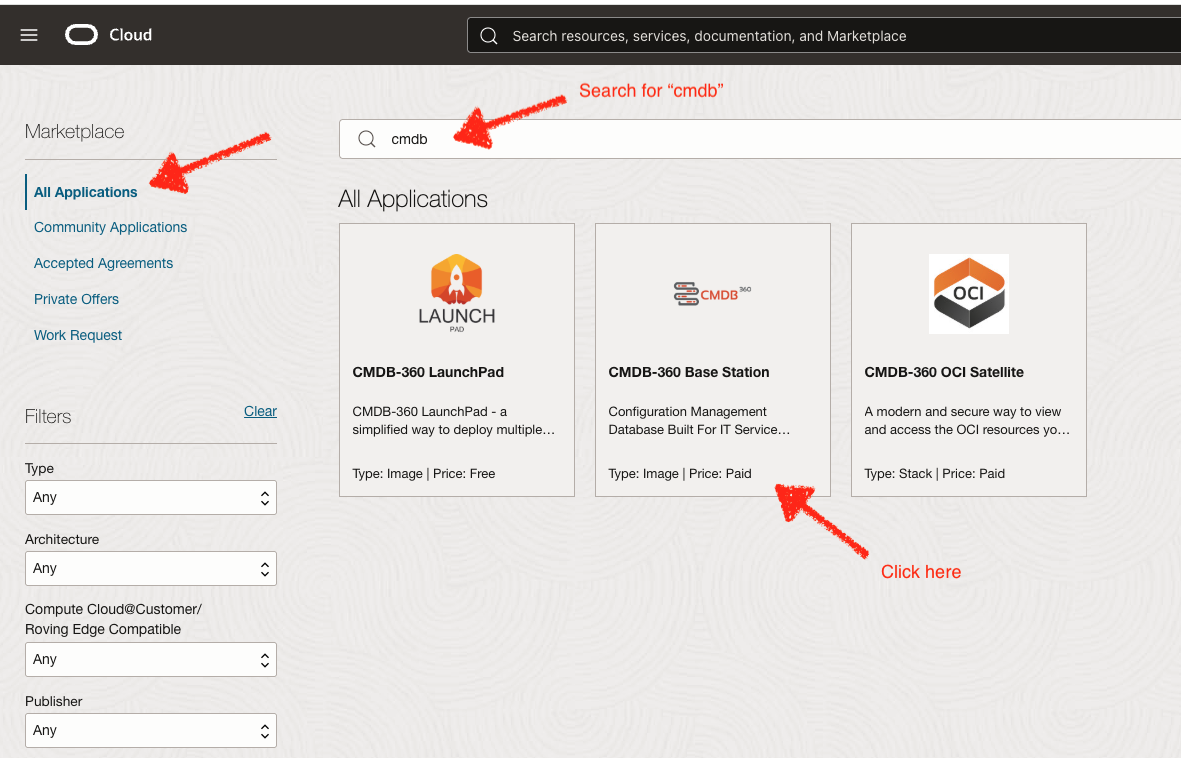
Click on the “CMDB-360 Base Station” card to access the launch page as shown:
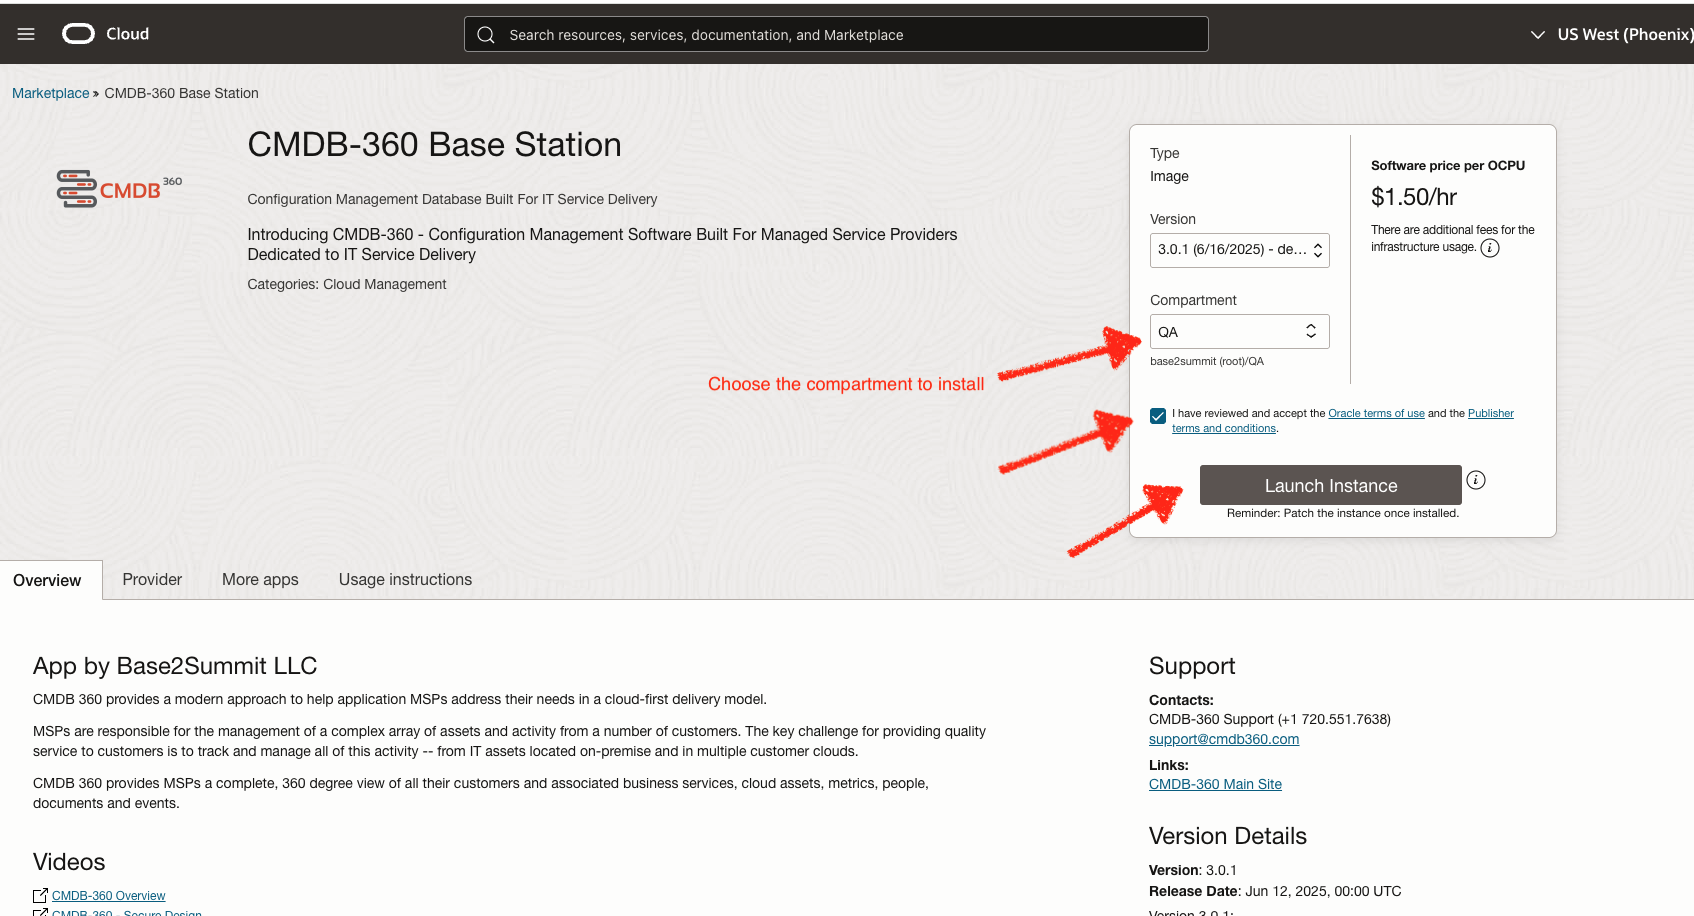
In order to launch the appliance, you will need to designate the OCI Compartment in your OCI tenancy where the virtual machine will be located (this may be changed later in the configuration screen). Once you check to accept the terms and conditions for both Oracle and CMDB-360, you may click the Launch Instance button to access the configuration screen as shown:
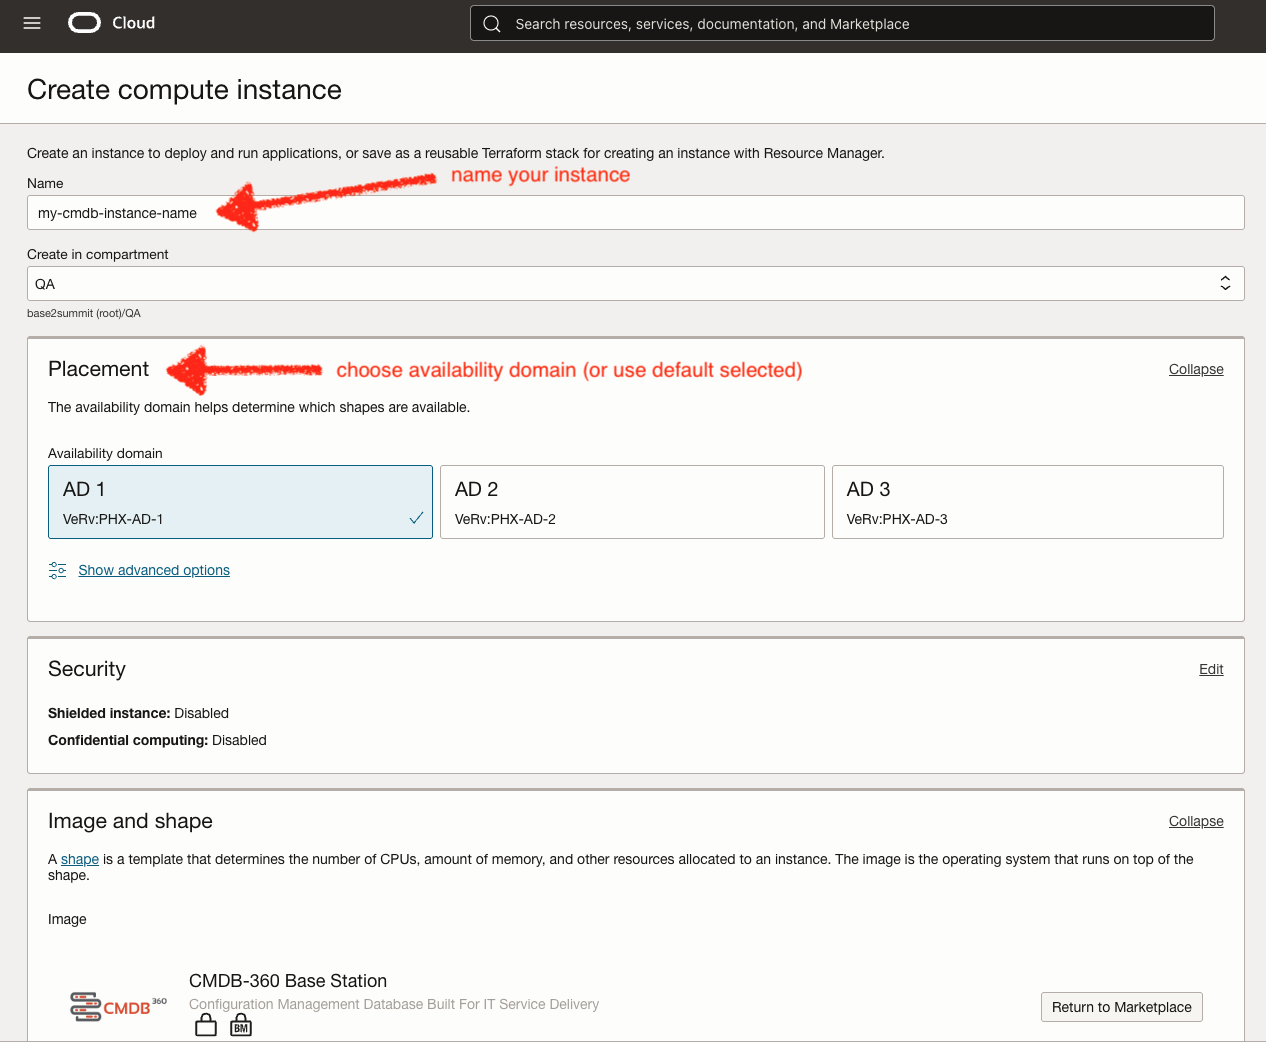
At this point, you are in a screen that is similar to a standard screen to deploy an OCI Compute image. Simply follow the normal steps, including naming your instance. We suggest you name the instance “CMDB-360” or something similar.
You may also modify the OCI compartment where the virtual machine will be located and also the availability domain. There are advanced options as well that follow the guidelines of deploying an OCI Compute image (not covered in this document). Please see OCI documentation for additional details.
# Configure OCPUs and RAM
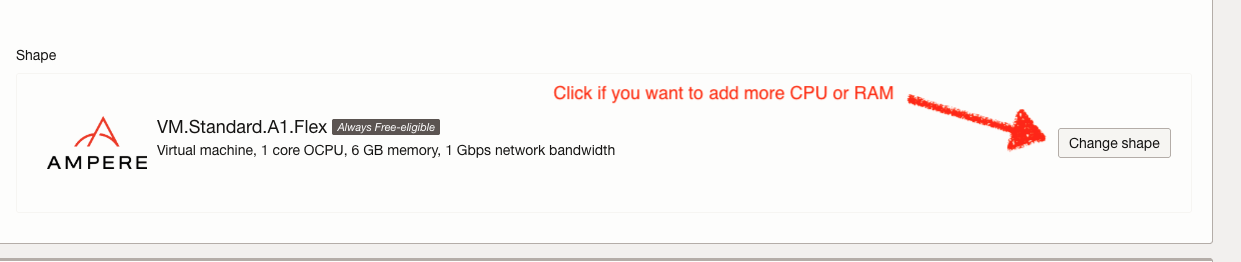
By default, the CMDB-360 Base Station image is configured as an Amphere (ARM) instance with 1 OCPU and 6 GB RAM. These settings are the minimal required to operate the system and to run a small demo or proof of concept. We recommend you do not run more than 10 satellites in production mode with the default settings.
To add additional OCPUs and RAM, click the Change Shape button:
You should receive the shape configuration detail screen as shown:
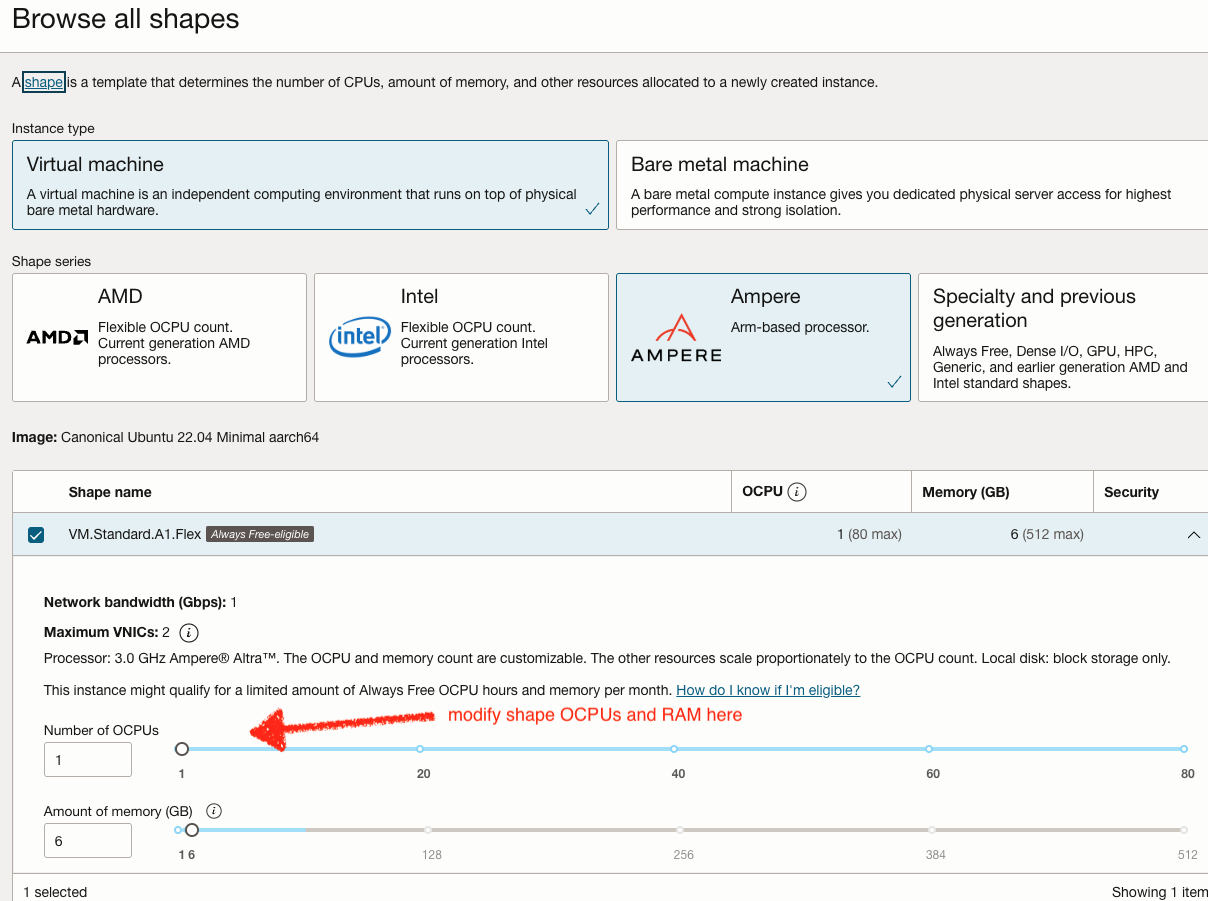
You may add additional OCPU and memory (RAM), then click Submit.
Note
We suggest 2 OCPU and 12 GB memory for a small production system which will support up to 100 satellites. Using less resources may result in slow performance and lag times.
# Configure Networking
You may configure the associated compute VNIC to your pre-established OCI Virtual Cloud Network (VCN) or you may create a new VCN using the functionality available on the screen as shown:
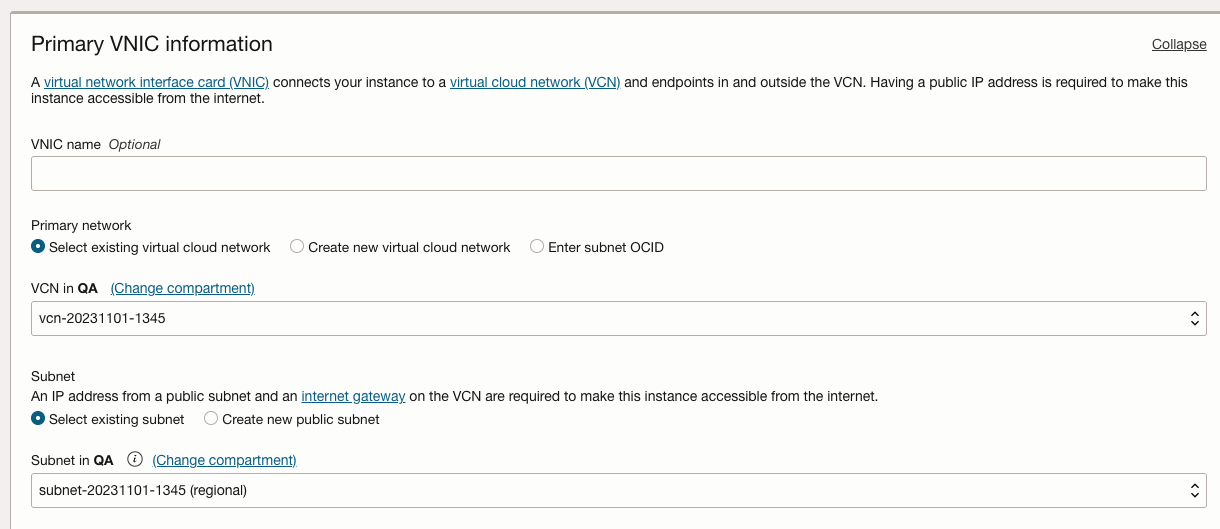
Select the Primary Network and Subnet in which to operate your CMDB-360 virtual machine. Please see OCI Networking documentation for additional details.
Note
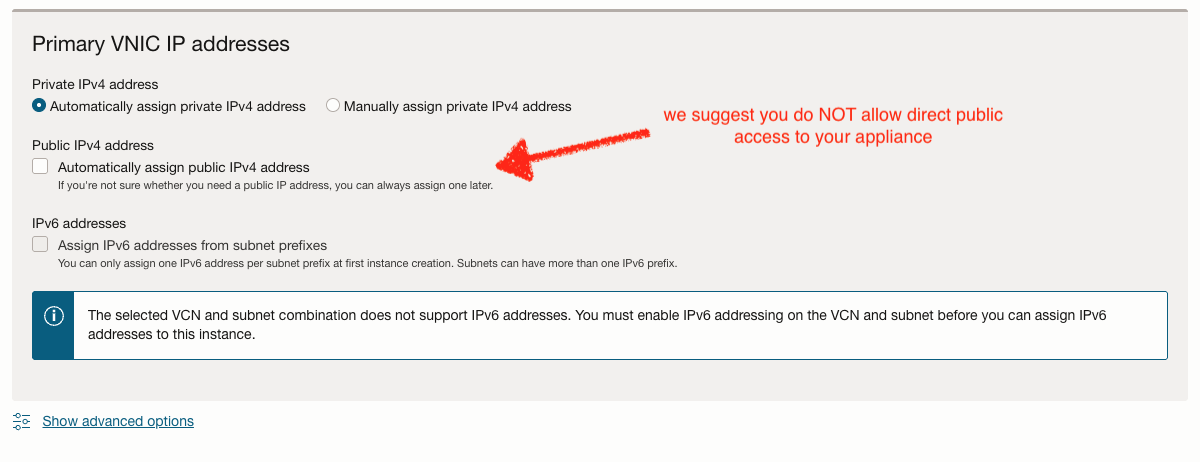
CMDB-360 does not require access directly from a public subnet. While we have taken many steps to provide a secure image using modern tools and concepts, we suggest you do not place your cloud appliance directly accessible from the public Internet as a precautionary measure. You should deploy the appliance in a private subnet and use a load balancer to direct web traffic to your appliance. You may also use the OCI Bastion Service to access your system with SSH if needed (not common).
As noted above, you do not need to assign a public IP address to your system (we recommend against it). This is to prevent any unauthorized attempts to login to your system.
# Instance Provisioning and Access
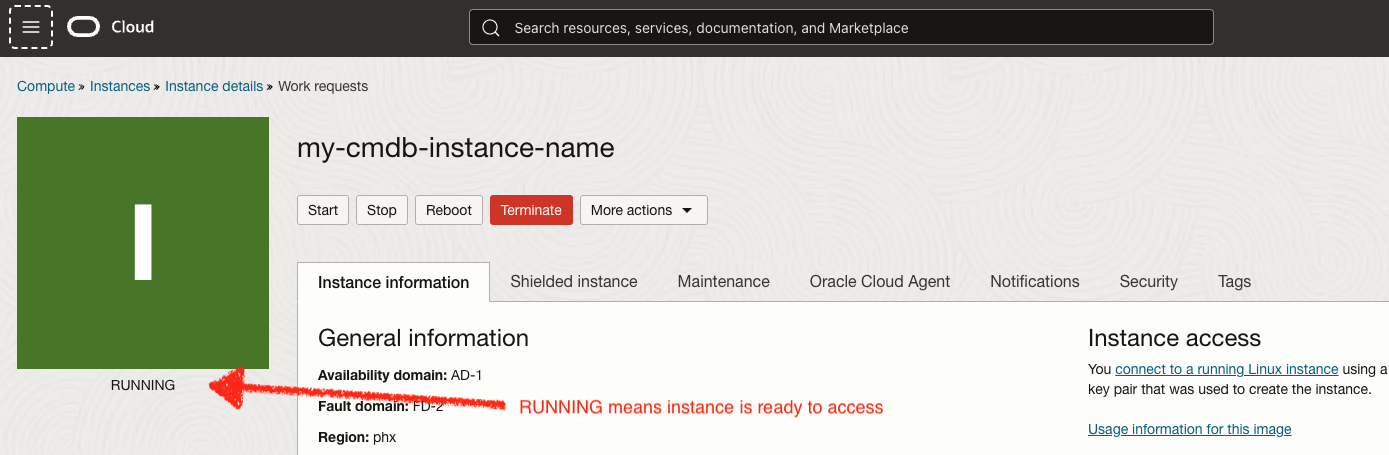
Once you have clicked the Submit button, you should see the detail screen for your deployed OCI Compute Instance (the CMDB-360 Base Station). Once the instance displays “RUNNING” as the status, you may access the instance:
At this point, you will need to deploy an OCI Load Balancer that is accessible from an Internet Gateway and which will negotiate your SSL certificate.
Note
If you had provided direct public access to your instance, you may configure the nginx web proxy that is provided in your CMDB-360 instance. This will allow you to configure your SSL certificates locally on the CMDB-360 Base Station and access web traffic without the need for a load balancer. See the documentation on how to configure the nginx web proxy if you are interested in this configuration: https://www.cmdb360.com/docs/?uri=Security/BaseStation/SSL-Configuration.html
Once you have configured SSL in either method described above, simply point your browser at https://yourcmdbdns/ to setup your initial login.
The initial configuration process is described in the following Getting Started documentation: https://www.cmdb360.com/docs/?uri=CMDB/GettingStarted/GettingStarted.html