# Setting up Gitea Server Container
A Installation Guide with SQLite Database for a Private Git Server
# Introduction
Gitea is a lightweight, self-hosted Git service that provides a simple way to manage repositories, users, and organizations. This guide walks you through the installation process using the Gitea container supplied by CMDB-360. This container can run on a CMDB-360 Launchpad or any VM that is running Docker.
This setup will require SSH access to the Launchpad or Docker VM and assumes git is loaded on your desktop machine.
# Step 1: Pull the Container Image
Login to the launchpad, or other VM running docker, where you would like to have your Gitea server run. Docker requires sudo access, so become the root user if you are not already.
sudo su
As the root user, pull the docker image from Docker Hub or your private registry.
docker pull gitea/gitea:latest
Check the images was received by listing the docker images.
docker images
Your should see something like, along with a list of other images available:
REPOSITORY                                 TAG       IMAGE ID       CREATED         SIZE
gitea/gitea                                latest    2579e35db2b4   2 weeks ago     177MB
# Step 2: Run the Container
Start the container. The HTTP and SSH port will need to be mapped ports on the host machine. Gitea uses ports 3000 for HTTP access and 22 for SSH access. In this example, HTTP is mapped to port 3030 on the host and SSH is mapped to 2222.
docker run -d -p 3030:3000 -p 2222:22 gitea/gitea
# Step 3: Finish Install
Point a browser to the host machine at the HTTP port you choose. For this example, the host machine is on an internal network at IP 10.0.0.60. So enter: 10.0.0.60:3030 into your browser address bar. You should see a webpage like
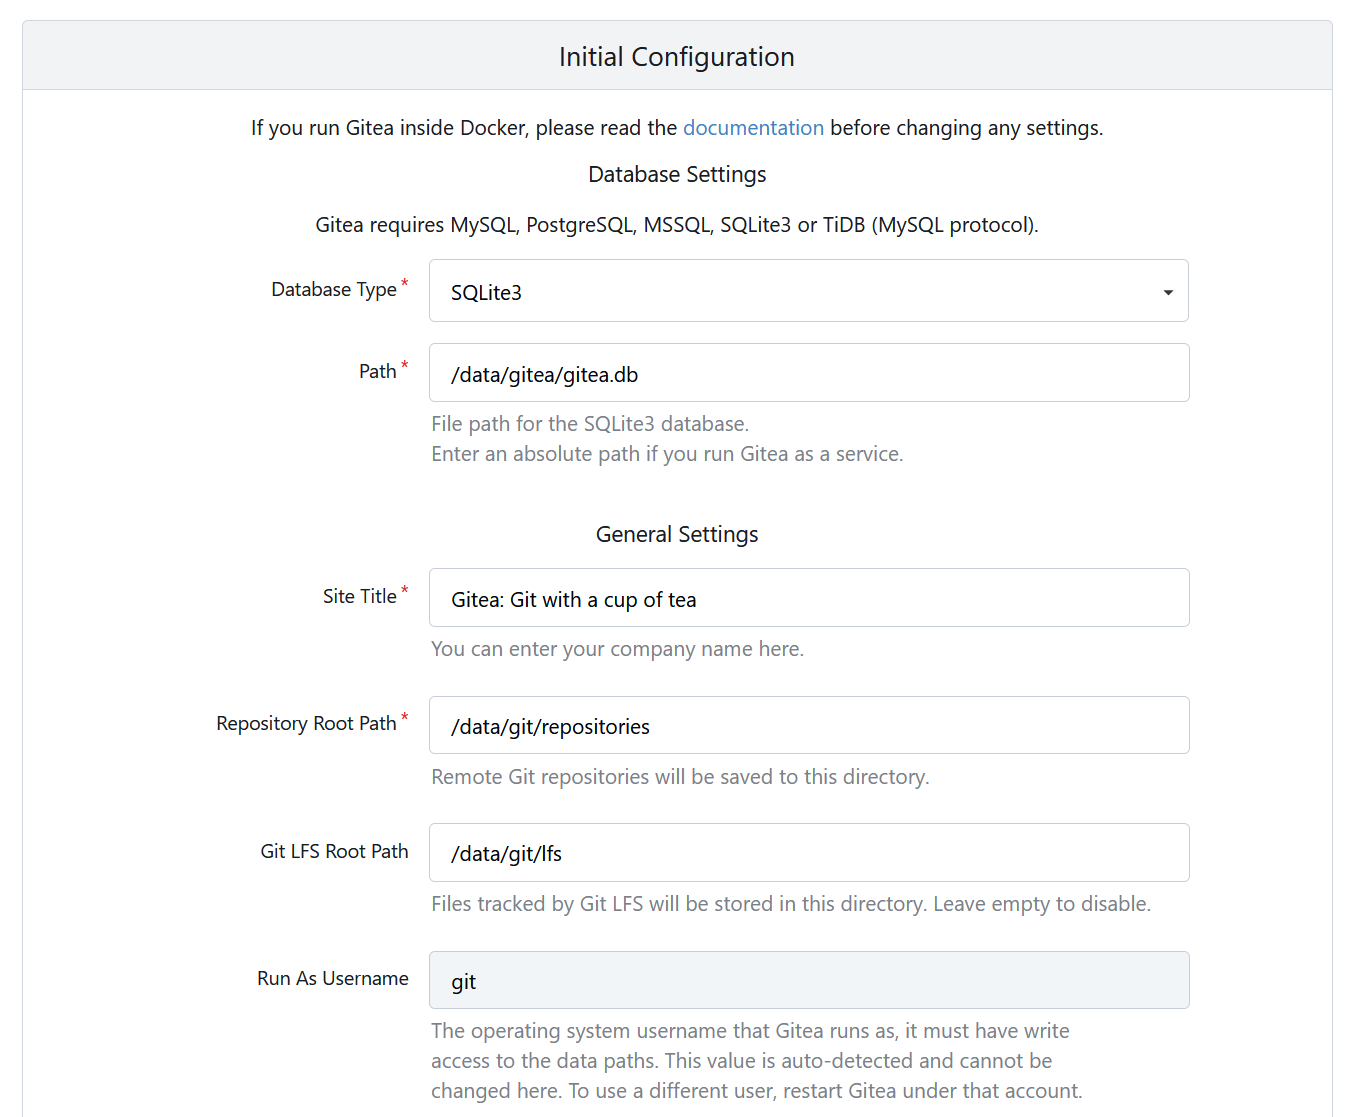
Note: If you do not see the webpage, check you network setting. Ensure that your desktop has access to the network where the Gitea Server is running.
You do not need to change any settings, but may if required. At the bottom, select the ‘Install Gitea’ button. After a short time, a page will load asking for Administrator account info. Fill in all the fields and continue to the Gitea Home page.
# Step 4: Create the Repository
The Gitea Home page:
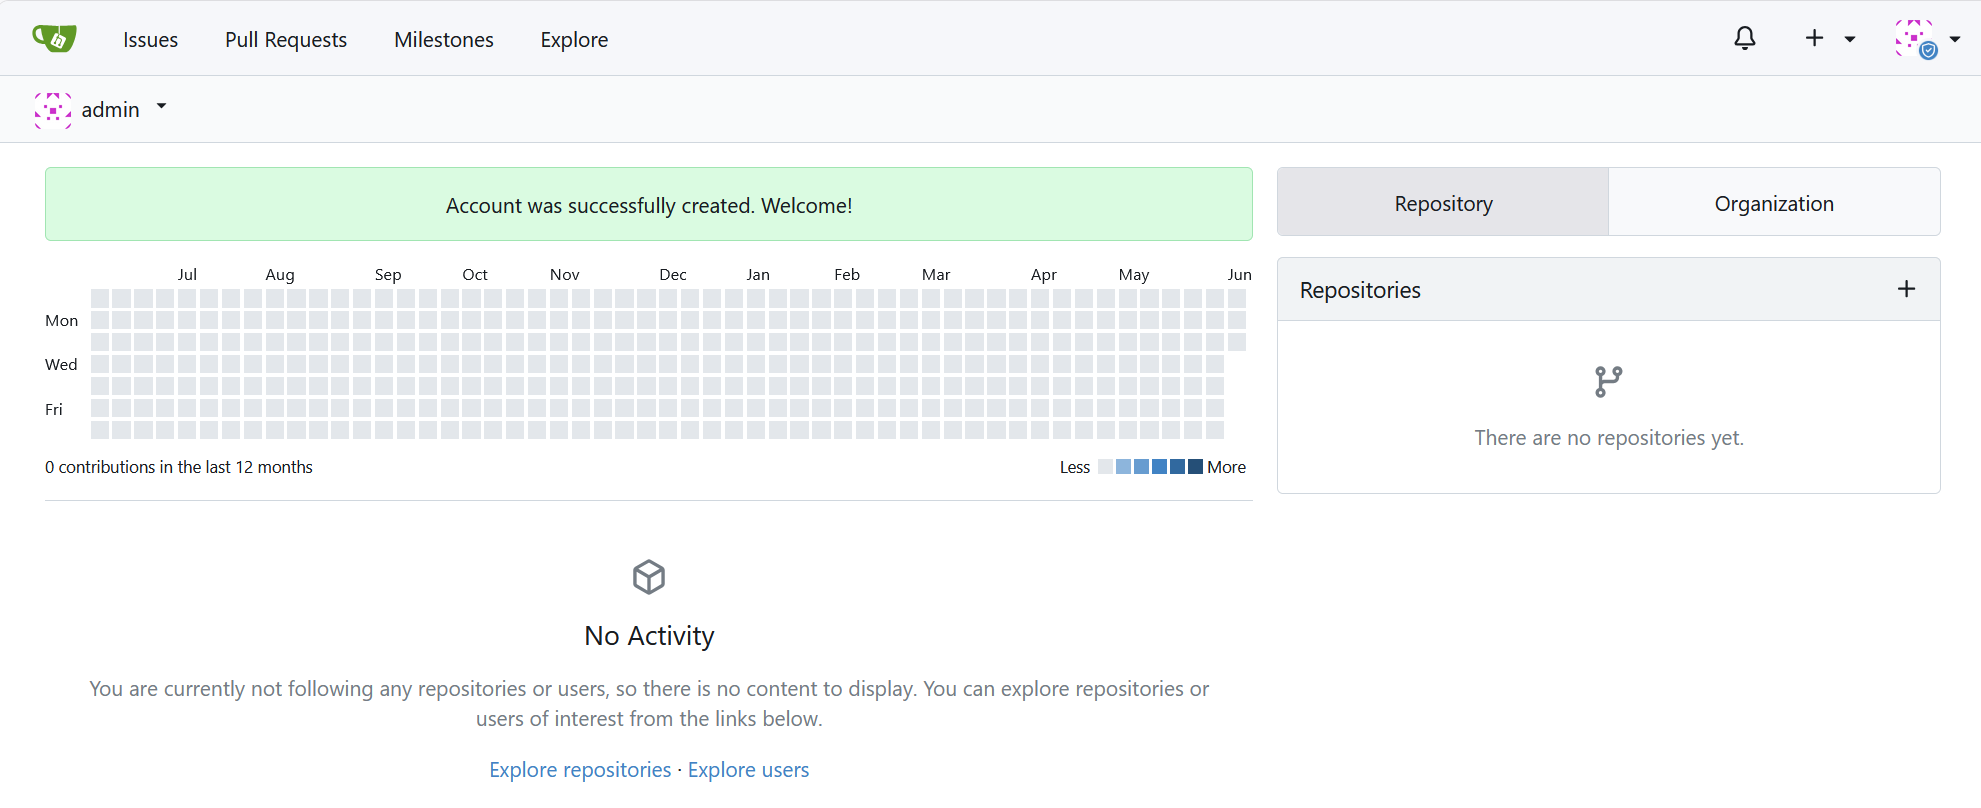
From the Gitea Home page, create an Organization to hold your repositories. Organizations are a good way to control shared repositories. Since the CMDB-360 Ansible Satellite only pulls the main branch whether you are testing in a lab or using the playbooks in production, branching is not an effective way to control development of the Ansible playbooks. In general, you should have a development repository and a production repository and each Ansible Satellite should be configured to use the appropriate repository.
Create an Organization by selecting on the Organizations tab and clicking the ‘+’ button. Give it an appropriate name and choose the visibility and click the ‘Create Organization’ button.
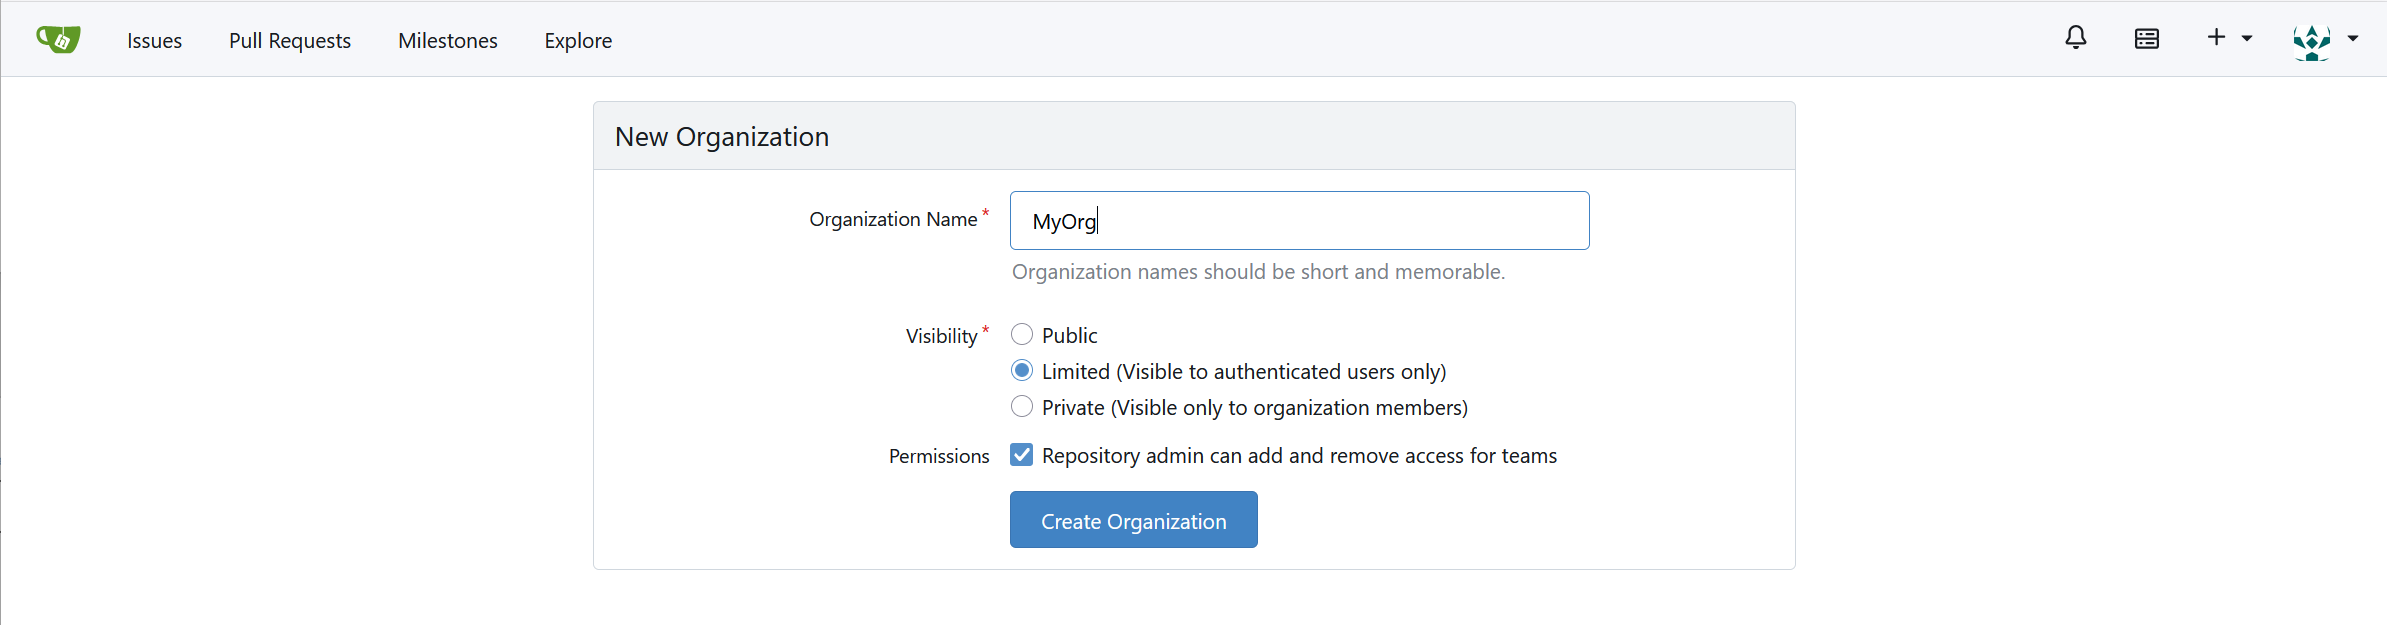
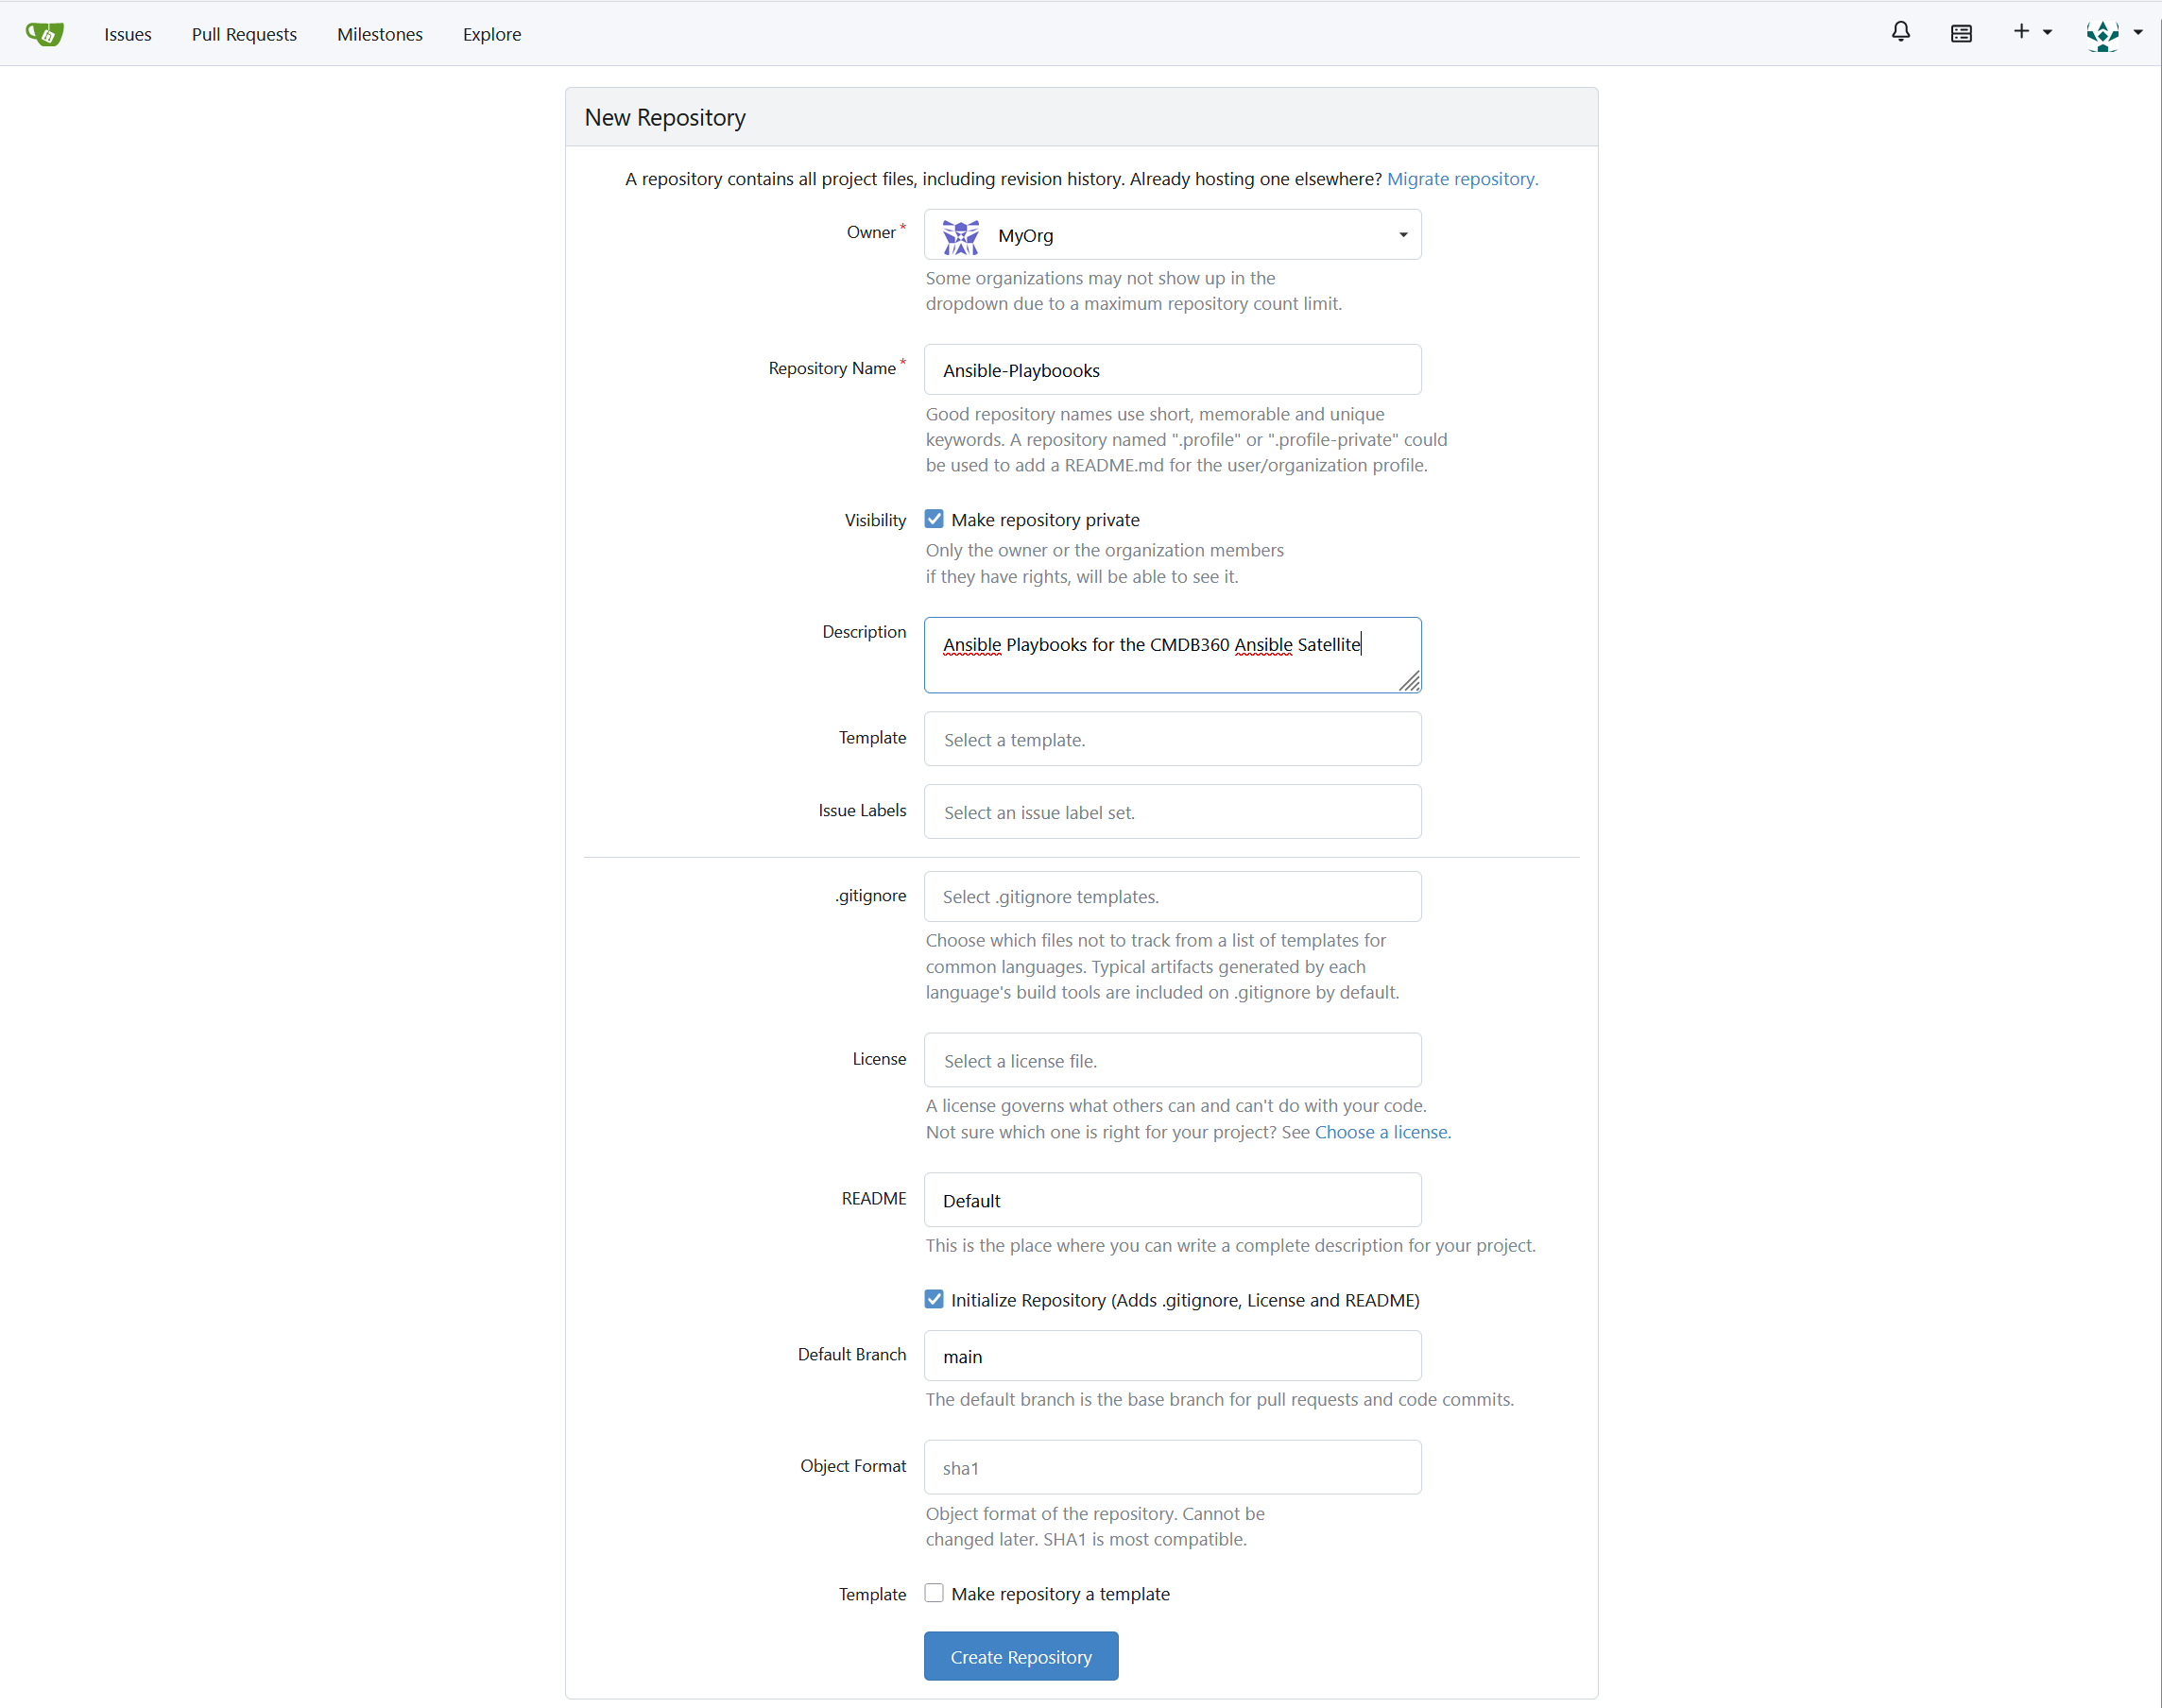
After you have created an Organization, create a repository under the Organization by clicking on the ‘+’ in the Repositories tab.
Give the new repository a useful name and click the ‘Create Repository’ button.
# Step 5: Configure the Ansible Satellite
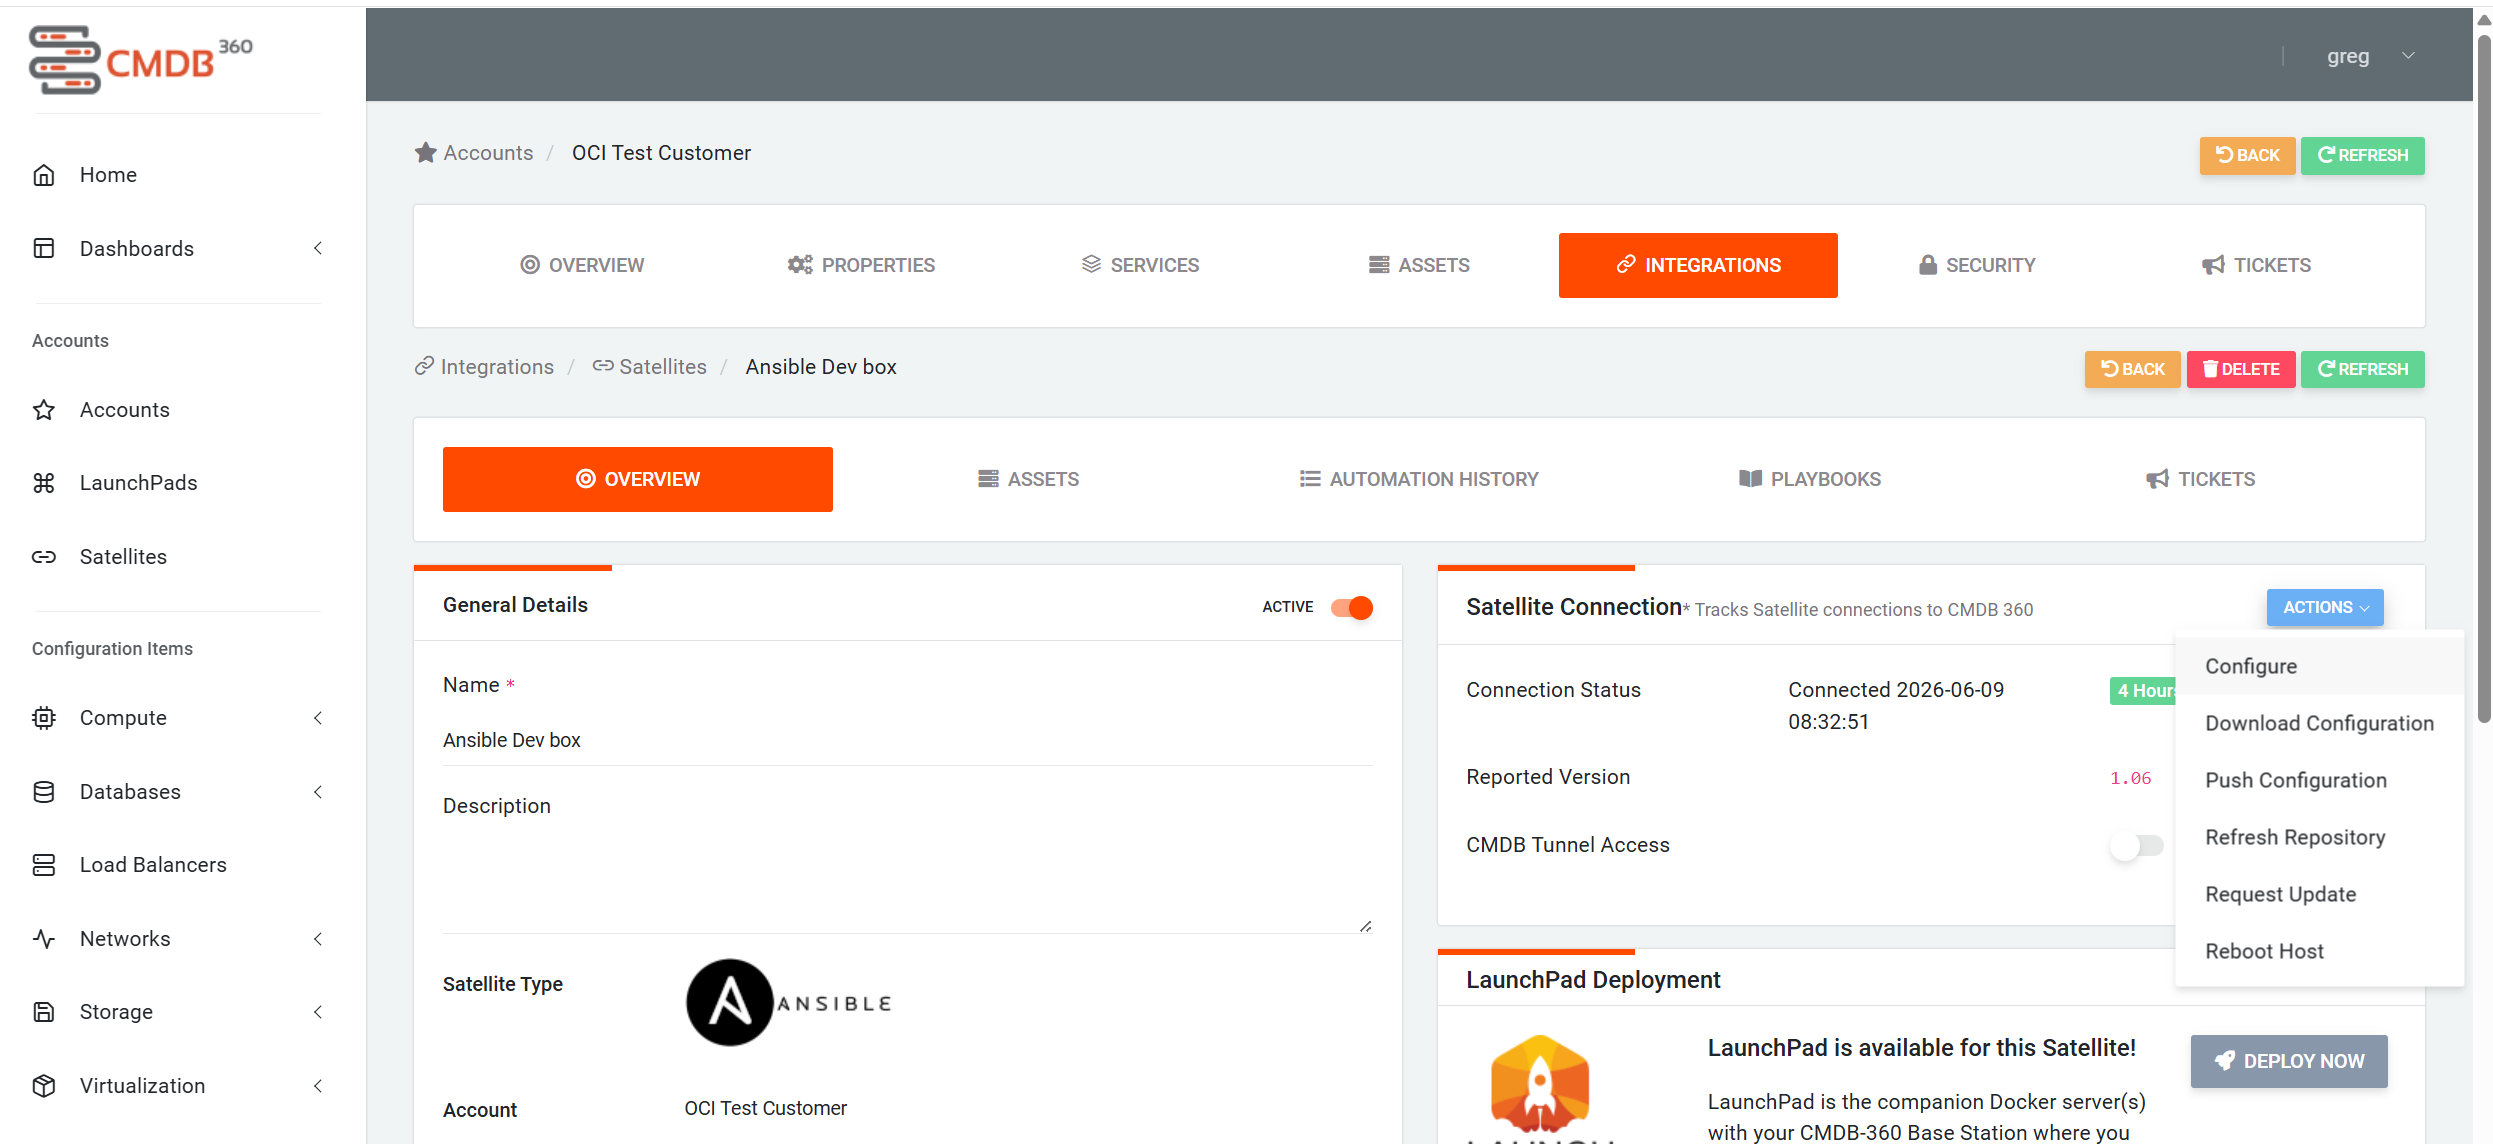
The CMDB-360 Ansible Satellite can use this repository as a source for its playbooks. To do this login into your CMDB-360 portal and select the Ansible Satellite to configure. From the Actions dropdown menu in the Satellite Connection area, select Configure
The following screen should appear.
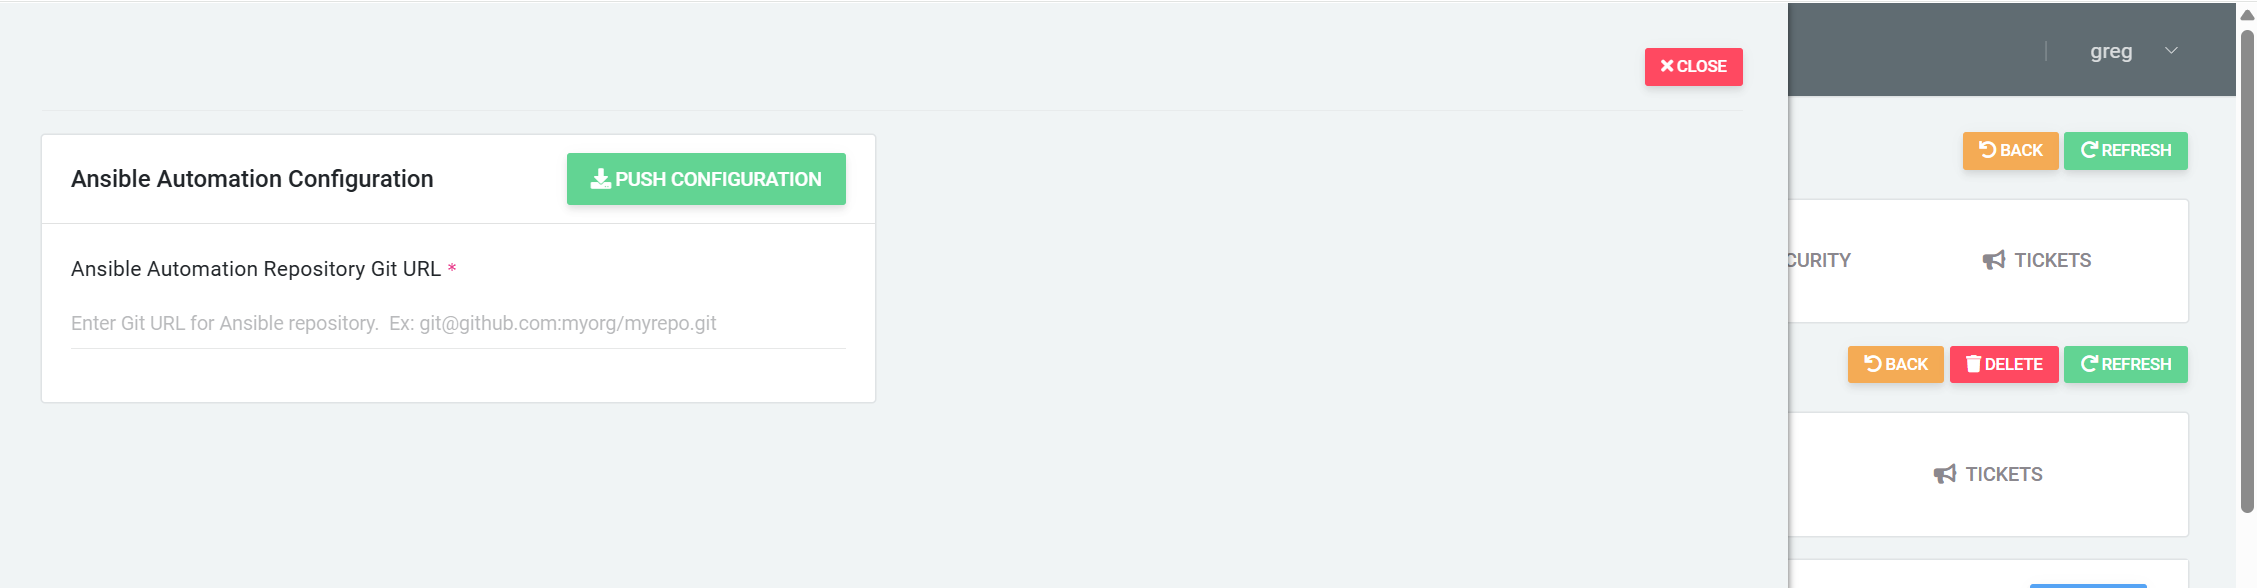
Enter the git connection information and press the ‘Push Configuration’ to send the new configuration to the Ansible Satellite. The Ansible Satellite uses SSH to connect to the Gitea repository. A new SSH key pair will be generated when you configure the Ansible Satellite. That public key must be added to the repository’s Deploy Keys in order to grant access.
# Step 6: Add the Deploy Key
In the Gitea portal, select the repository and click the ‘Settings’ button on the top right. Choose Deploy Keys from the left menu and click the ‘Add Deploy Key’ button
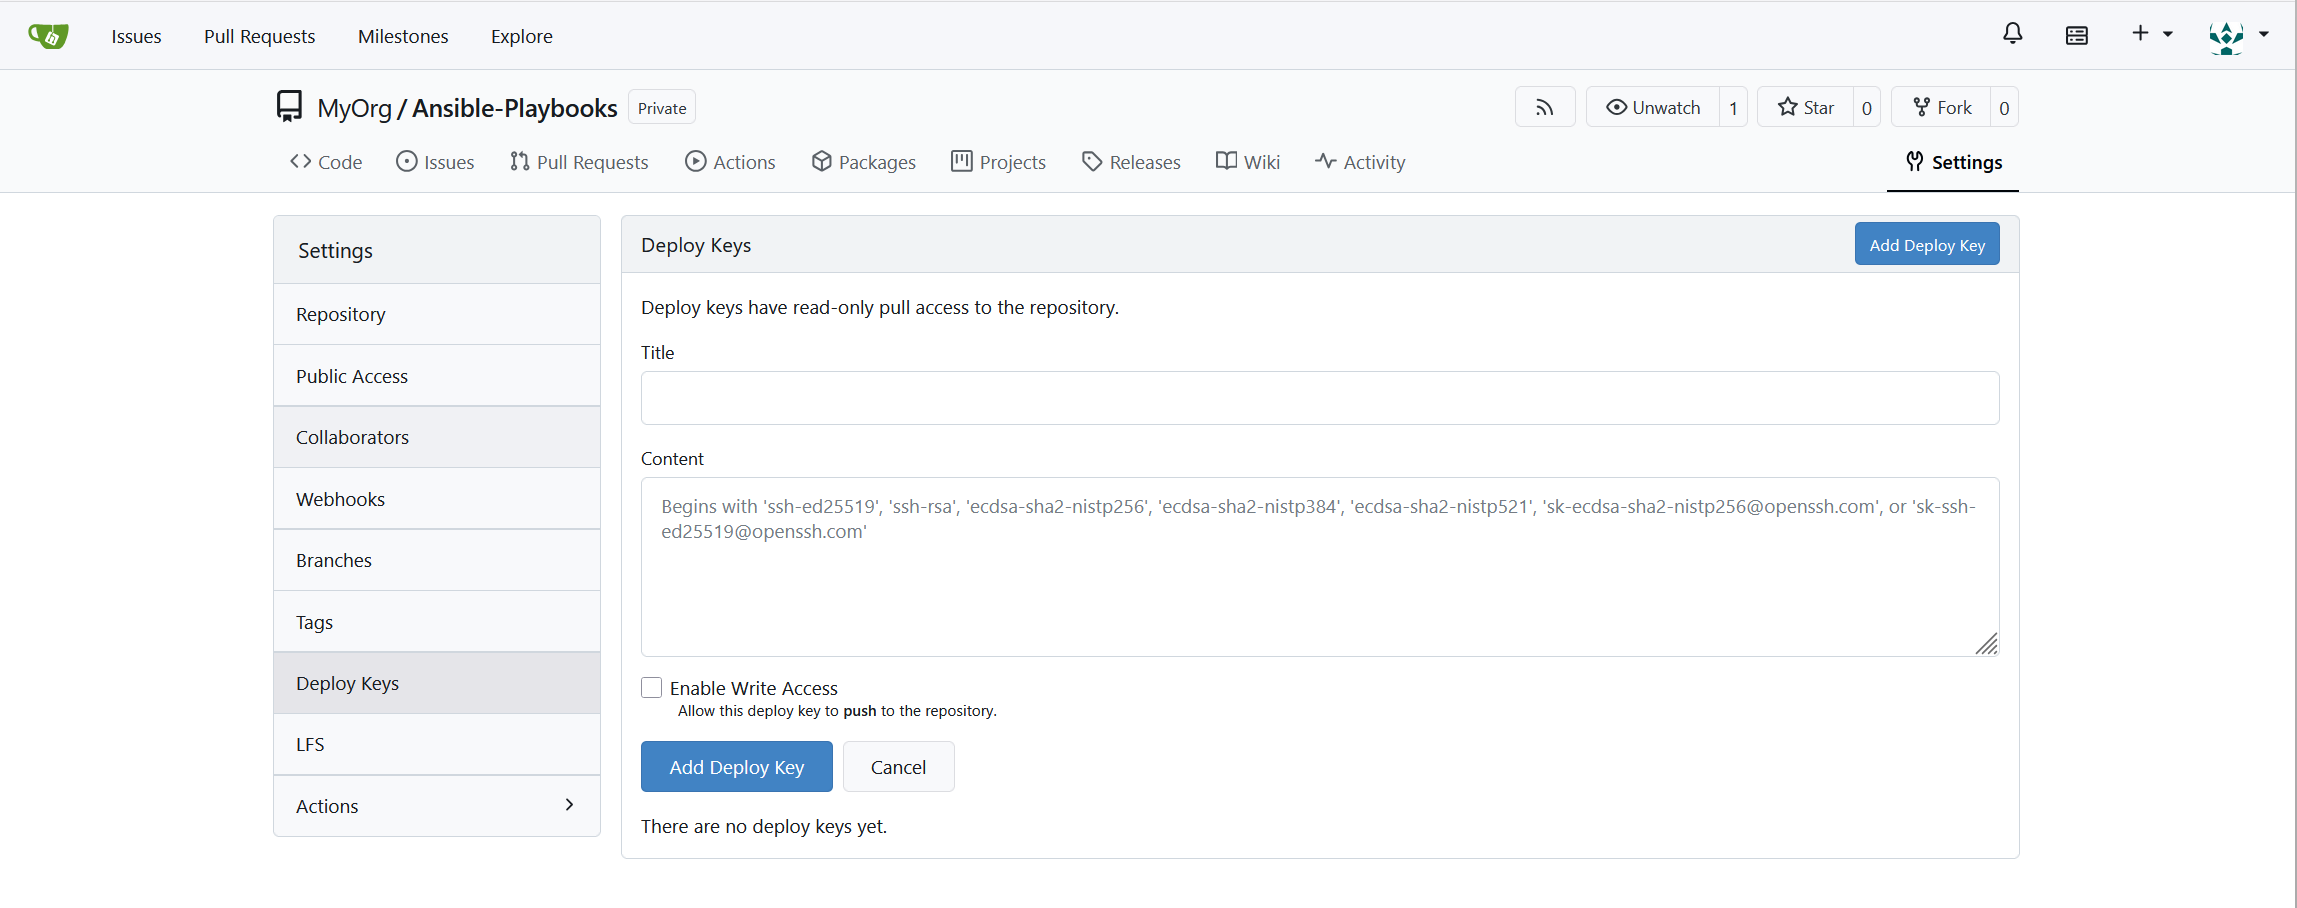
Copy the SSH public key from the Ansible Satellite Overview page in the CMDB-360 portal into the Content box and give the key a relevant title. Click the ‘Add Deploy Key’ button.
You should now be able to select ‘Refresh Repository’ from the Actions menu of the Ansible Satellite’s Overview page to pull the latest playbooks to the Ansible Satellite. A message should appear stating the repository was cloned, updated or was up to date already.
Your Ansible Satellite is ready to run these Automation playbooks. Click on the Playbooks tab of the Satellite to see the available playbooks.
# Step 7: Granting Access to Users
The real power to CMDB-360 Automation is the ability to personalize the base playbooks or create your own. In order to do this you should create users in the Gitea server for each playbook developer and make them a Collaborator on the appropriate repositories.
# Setup Users
Login as the Admin user and from the Icon in the top right corner, select Site Administration
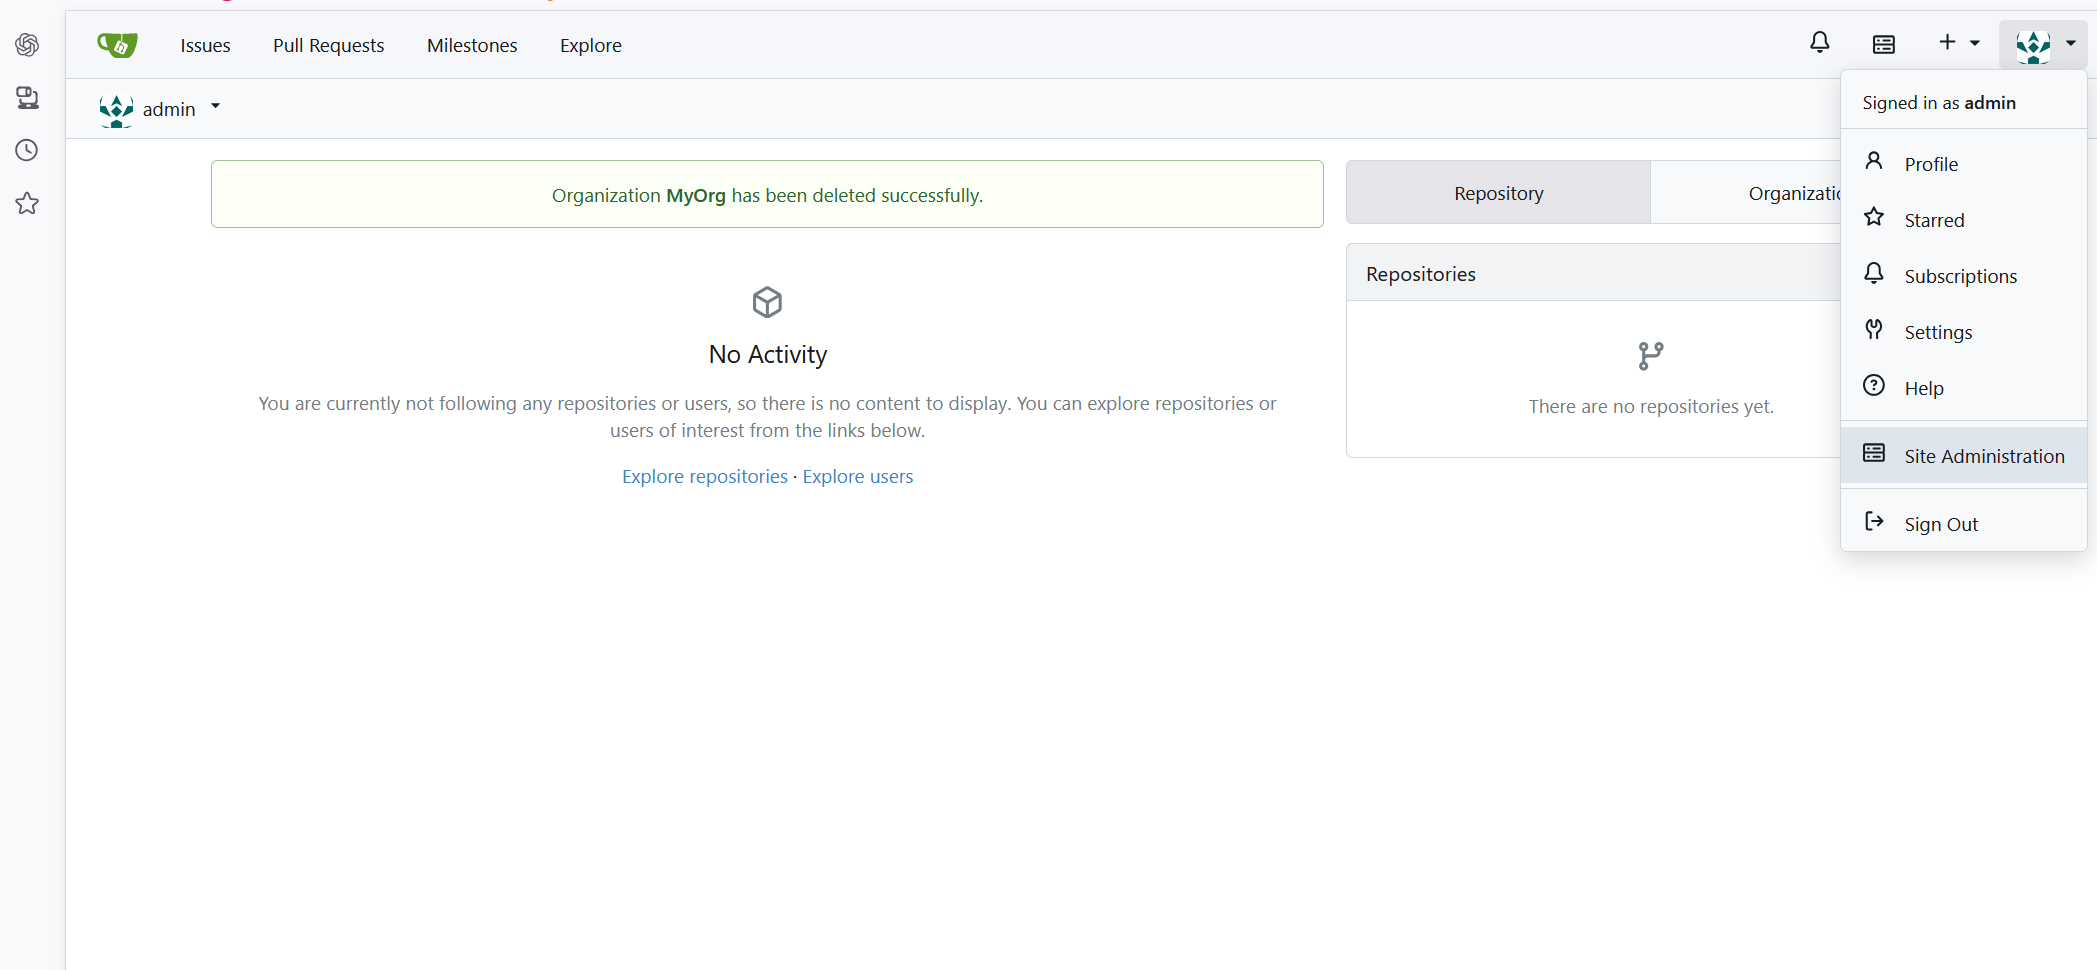
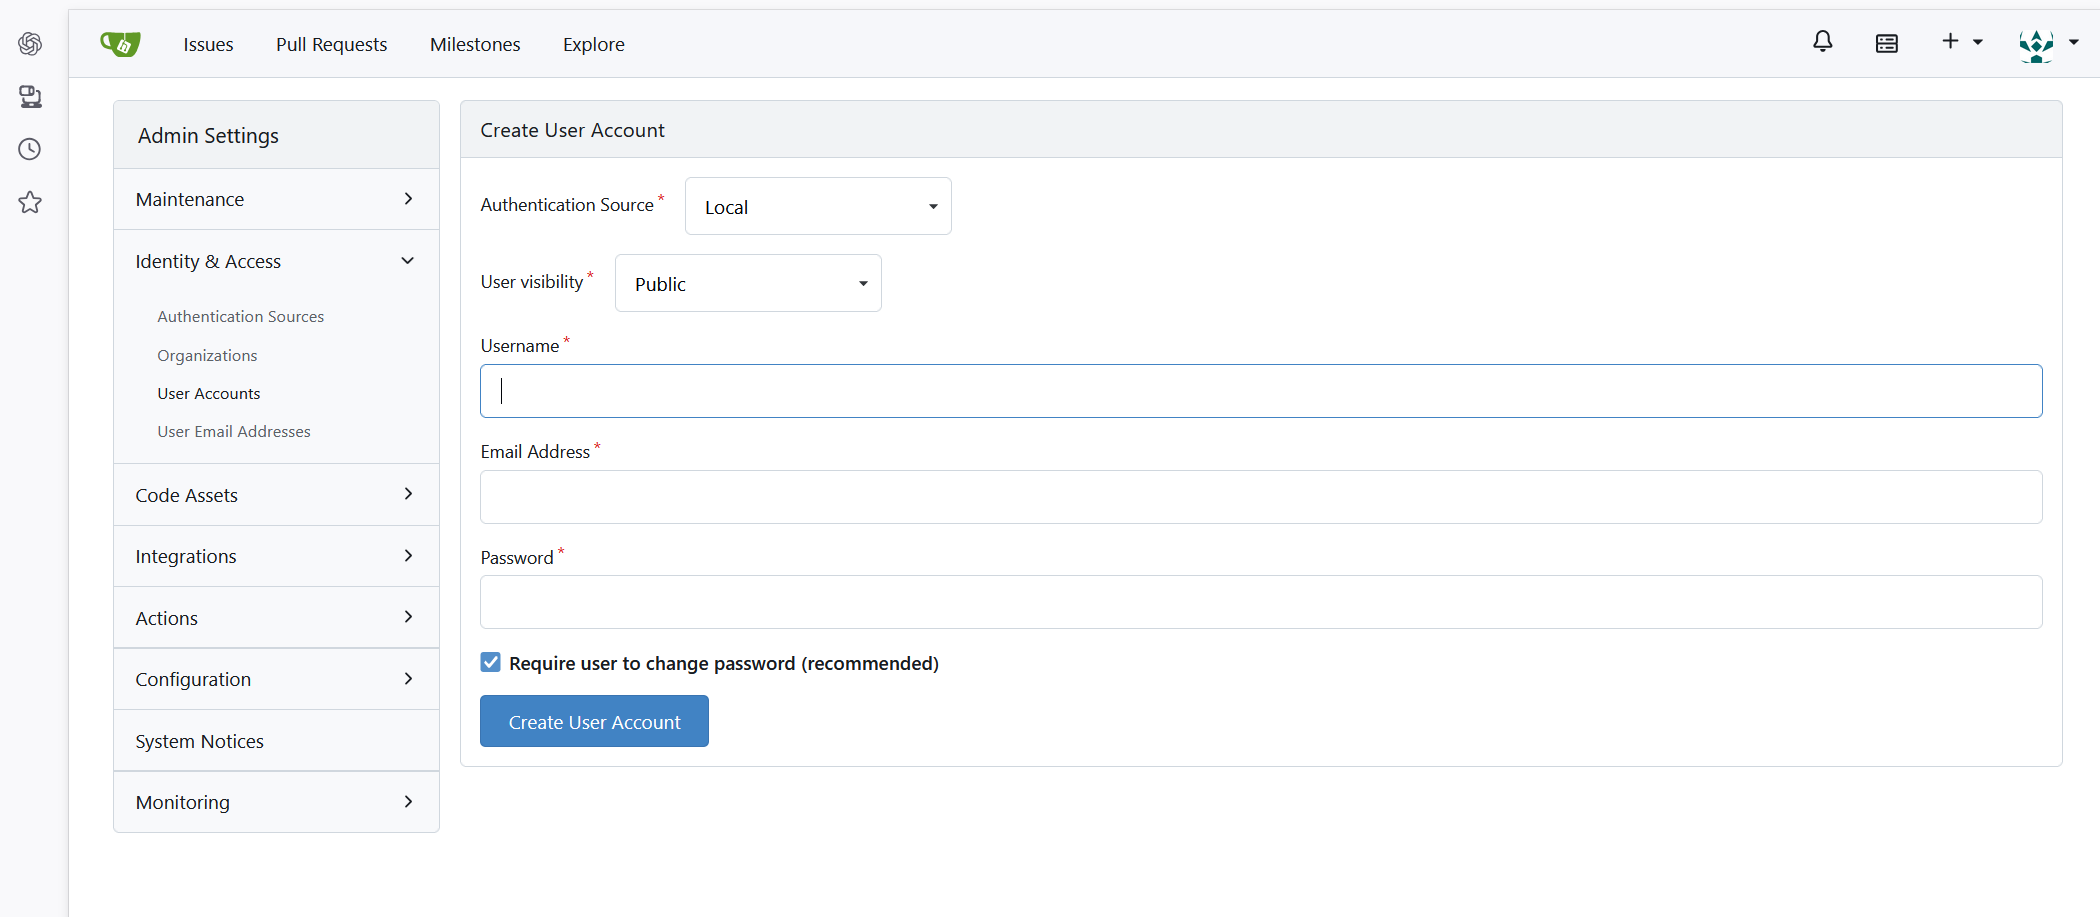
Then from the Left Menu, select User Accounts and click the Create User Account button. Select the Visibility Level and fill in the fields for the new user and click Create User Account. This user may now log into the Gitea server.
# Make User a Collaborator
From the Repository’s Settings menu, select Collaborators. Search for the user and add them as a Collaborator for the repository that need read/write access to.
Note: SSH keys are generally an easier and more secure way to access the repositories. Each user should login to the Gitea portal and add their SSH public key under their account Settings -> SSH / GPG Keys
Users who are Collaborators have full access to the repository. They may clone it and push changes to it.
# Step 8: Adding the Base or Original Playbooks (Optional)
CMDB-360 comes with a base set of playbooks to be used for automation tasks or as templates for developing your own playbooks. These may be downloaded from the CMDB-360 portal and added to your get repository. Clone the repository to your workstation and add the playbook appropriate directory. When finished with your modifications, commit and push the new playbook(s) back to the Gitea repository. Ansible Satellites configured to look at that repository will pull any changes nightly. Or you may force a refresh imeditately by selecting Refresh Repository from the Actions menu on the Ansible Satellite.
# Conclusion
Congratulations! You’ve successfully installed a private Gitea server running on a Docker container. Your self-hosted Git service is now ready to manage your playbook code repositories securely.
Note that development should occur in a separate repository from the production playbooks.
For more information and advanced configuration options, visit the official Gitea documentation at https://docs.gitea.io.